Meet Party Planner, the perfect partner for creating unforgettable parties and events. With its intuitive interface and comprehensive functionality, this all-in-one tool simplifies your planning process. Featuring six user-friendly sections—"TO DO", "Guests", "Food", "Shopping", "Budget" and "Misc" —alongside essential information, Party Planner equips you with a wealth of powerful features.
Designed to enhance your planning experience, Party Planner seamlessly organizes your tasks and responsibilities. The "TO DO" section automatically prioritizes your action items, ensuring you never miss a beat.
Effortlessly manage your guests with the "Guests" section, as you import contacts and keep communication within the app. Track RSVPs and maintain a seamless connection with your attendees through quick call and email access.
The "Menu" section transforms your culinary vision into a reality. Plan your menu, assign to-do tasks and shopping items to each dish, and effortlessly create a synchronized to-do and shopping list. Discover new recipes from the web, save them for future reference, and infuse your event with gastronomic delights.
Track your finances with ease using the "Budget" section. Monitor expenses, set spending limits, and maintain a clear overview of your event's financial landscape.
To expedite your planning process further, Party Planner allows you to create similar events by importing items from existing ones. This time-saving feature eliminates the need to start from scratch, empowering you to effortlessly organize multiple events.
With Party Planner, you can elevate your event planning game to new heights. Experience the convenience, efficiency, and organization it brings to every aspect of your party or event preparation.
Key Features:
• Sorted to-do list shows how long until event date/time for easy planning
• Import guests from contacts and quick call/email access within the app
• Assign to-do, shopping items and guests when planning the menu
• Create similar event by importing from existing events
• Data are automatically synced to the cloud so it can be accessed from multiple devices
• Share lists between users
Notes for the old My Party Planner app users:
You can also migrate your lists from the old app to the new app. Please see “Backup and Restore” section below for more detail.
Login/Sign up
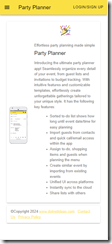
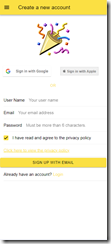
To login/Sign up, click “LOGIN/SIGN UP” button the top right of the home screen. You can sign in with Google/Apple or sign up using email/password.
Creating New List
To create a new list, click the “+” icon on top right of the Home screen. It will prompt you to enter the event name.
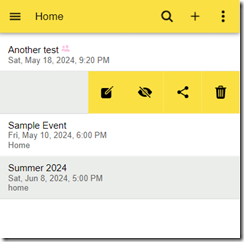
To see the options for an event, swipe the event name to the left. There are options for editing the event, changing the event status, deleting the event or sharing the event. We will explain the event sharing feature later in this guide.
Edit Event
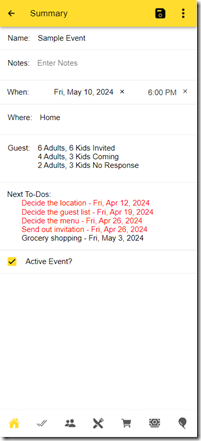
Once an event is created, it will automatically send you to the detailed view of the event. The event detail view has 7 tabs. They are “Home”, “TO DOs", "Guests”, "Food”, "Shopping”, "Budget" and "Misc" The first one is the event header. It displays the summary of the event. You can add note, change the event date/time and set the location.
In all the tabs besides the “Home” tab, you can add, edit and delete items.
To add a new item, click on "+" at the top right of the screen. It will open the item detail view.
You can also add multiple items at a time by clicking on the floating icon at the bottom of the screen, then the list icon.
To edit or delete an existing item, swipe item to the left. Then click on edit icon or trash can icon.
Edit To-dos
The To-dos tab displays to-do items sorted by due date/time. If a to-do is for a dish, the name of the dish will be displayed along with due date. It also displays how long it is until the event date/time.
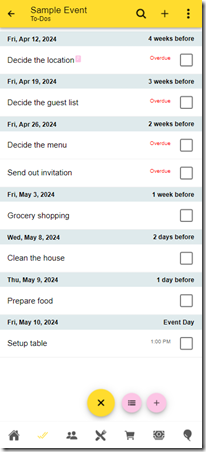
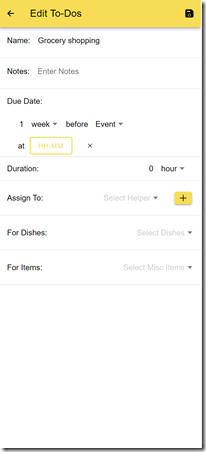
To add a new to-do, click on "+". The item detail view will show up. User can enter name, due date (in format of how long until event date/time or another to-do task), notes and etc.
You can also enter start time in addition to due date/time. "Start Time" is the time of a day this item needs to be started. It is not required. But if you do set it, then you can't set the relative due date/time to number of hours or minutes.
For example, if you have event/party date time set to June 15th, 2014 at 6pm, below shows you how the item's due date/time is calculated based on user input.
| Due Date/Time | Start Time | Calculated Due Date/Time |
| 2 weeks | | June 1st, 2014 |
| 3 days | | June 12th, 2014 |
| 3 days | 7pm | June 12th, 2014 at 7pm |
| 5 hours | | June 15th, 2014 at 1pm |
| 45 minutes | | June 15th, 2014 at 5:15pm |
| 0 hours | 5:30pm | June 15th, 2014 at 5:30pm |
Due date/time, start time and duration can also be edited by click on the due date/time display on the right side of each item.
You can assign helper to a task. Just choose a helper from the drop down list under "Assign To". To edit helpers, see the “Edit Metadata” section below.
To hide/show completed to-dos, click on the 3 dot menu and then “Hide/Show checked items"
Edit Guests
Guest tab displays guest list sorted by name. It also shows how many adults and kids under each guest and RSVP info.
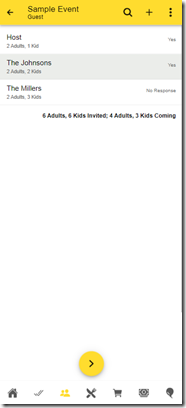
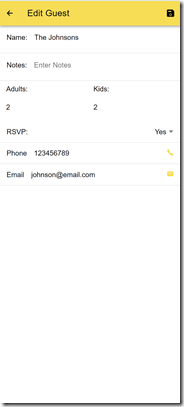
To add a new guest, click on "+". The item detail view will show up. You can enter name, phone number, email, number of adults and kids under each guest, RSVP and notes. There are call and email buttons for quick call and emailing to the guest.
You can also import from contacts on the device by clicking on the 3-dot menu and then select “Import From Contacts”.
Edit Food Items
Food tab displays menu for the event. It also shows to-do items if there are any. Clicking on browser icon opens up web browser view for quick look up of recipe if recipe URL is saved for the dish.
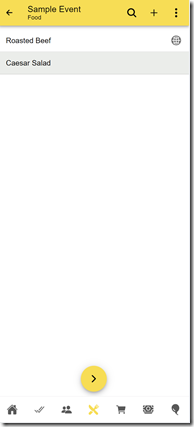
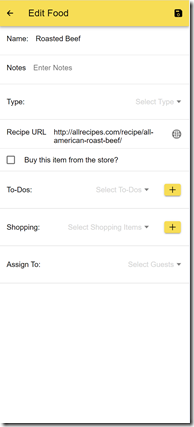
To add a new dish, click on "+". The item detail view will show up. User can enter name, type and notes. User can also add shopping items and to-do items for the dish or assign a dish to guests. There is a quick access button to automatically search recipe on the Internet for this dish. User can save the URL for future reference.
Edit Shopping Items
Shopping tab displays shopping list for the event. It also shows the dishes if a item is for particular dishes.
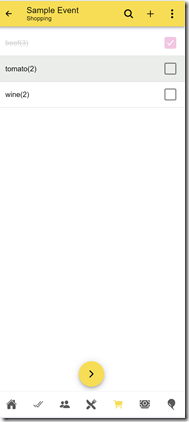
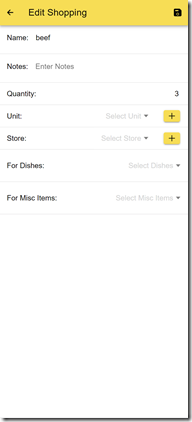
To add a new shopping item, click on "+". The item detail view will show up. User can enter name, quantity, unit, notes and dishes.
To hide/show completed to-dos, click on the 3 dot menu and then “Hide/Show checked items"
Edit Budget Items
Budget tab displays estimated and actual costs for the event. You can enter either total costs or cost per person. If you enter cost per person, the app will automatically calculate the total costs by following rules:
total estimated costs = estimated cost per adult * number of total adults invited + estimated cost per kids * number of total kids invited
total actual costs = actual cost per adult * number of total adult coming + actual cost per kids * number of total kids coming
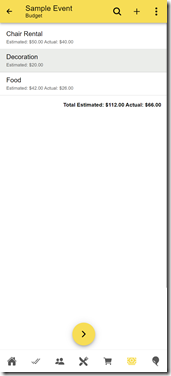
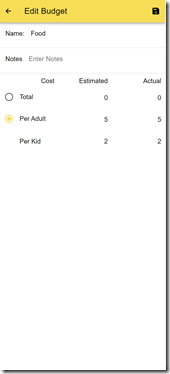
To add a new budget item, click on "+". The item detail view will show up. User can enter name, estimated costs, actual costs, and notes.
Edit Miscellaneous Items
Miscellaneous tab allows you to enter miscellaneous items which do not belong to previous categories.
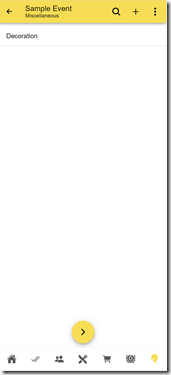
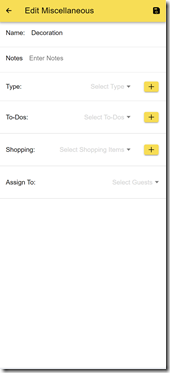
To add a new dish, click on "+". The item detail view will show up. User can enter name, type and notes. User can also add shopping items and to-do items for the dish or assign a dish to guests.
Import From Other Events
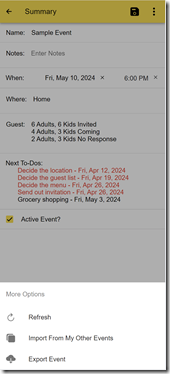
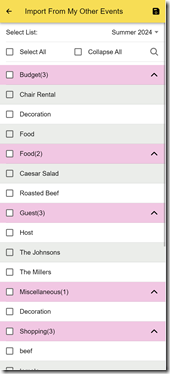
To import items from any of your events, open the event you are currently working on, click on the 3 dots icon on the top right. Then select “Import from my other events” from the popup menu. It will open the import view. Select an event, pick the items you want and click on the save icon on the top right corner.
Edit Metadata
To edit metadata such as the helpers, unit, store and other metadata, click on the menu icon on the top left and then select “Metadata” from the menu. Then you can choose the metadata type from the drop down and start editing them. If you delete a metadata, the value will be cleared from all the items associated with that metadata.
Export Event
To export an event, open home tab of the event and click on the 3 dots menu icon and then “Export Event” from the popup menu. You can then choose to text, email or save the items in plain text format using preferred apps.
Share Lists Between Users
To share a list with another user, swipe the list name to the left and click on the  icon.
icon.
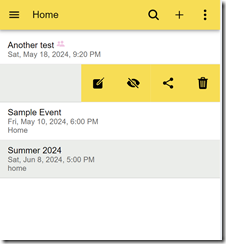
Then click on the “+” icon on the top right to enter the email address of another registered user.
An invitation will be sent to the other user. He/She will receive a notification on the “Account” tab in the app. They can choose to accept or delete the invitation. Once the user accepts the invitation, he/she will be able to see your list under his/her login. You can stop list sharing by delete the user from the “Share List With” view.
Backup and Restore(or Migration)
To backup and restore a list, click on the menu on the top left and then select “Backup & Restore” from the menu. It will save the lists to the local storage on your browser or device.
On an Android device, if you have the previous My Party Planner app(lite or full) installed, the new app will display the button “Migrate From My Party Planner” to allow you to migrate your lists from those apps.
For Android 10 and below, the app will try to navigate to the list folder the My Party Planner(lite or full) is using. You should see the following screen after clicking on “Migrate From My Party Planner” button. You can then click on the list you want to migrate and click on “Select” button on the top right to select the list.
For Android 11 and above, you will have to first use the “Backup and Restore” feature in the old My Party Planner app to backup your lists to a folder which can be accessed by the new Party Planner app. It is recommended to save your lists to the “Documents” or “Download” folder. When you click on the “Migrate From My Party Planner” button, it will open the file picker which should look like the screenshot below. You can then navigate to the folder containing the backup and select the list file you want to migrate.
After selecting the file, you will be prompted to check the content and then click on the “Confirm” button to complete the migration.
You can also select multiple files and migrate them at once.
Sometimes if you don’t see your lists after the migration, you might need to kill and restart the app.
Account View
To edit user preferences, sign out or delete the account, click on the menu on the top left and then select “Account” from the menu. In the preferences section, you can enable dark theme and etc.
Please note, if you want to delete your account, you will be prompt to sign out and sign in again to refresh the credential.
Offline Mode
The app allows usage without an internet connection, with certain limitations. Any modifications made are saved locally and synchronized once the device regains online connectivity.
Where To Find the Apps
Web Site:
Party Planner on the web
Google Play Store:
https://play.google.com/store/apps/details?id=com.dotnetideas.partyplanner
Apple App Store:
https://apps.apple.com/us/app/party-planner/id6497567947
Contact Us
Please feel free to contact us at support@dotnetideas.com if you have any questions or feedback. Thank you!