Party Planner User Guide

February 20, 2024 at 9:19 AMAdministrator

Coming soon!

Posted in: Party Planner | User Guide

Opus–Task Helper User Guide

July 4, 2023 at 1:15 PMAdministrator

Opus - Task Helper is an intuitive task management app that aims to streamline your chore management experience at home or any other location. With its user-friendly features and enhanced functionality, Opus simplifies task tracking and helps you stay on schedule.

Key Features:

  • Efficient Task Tracking: Opus records the completion date of each task and calculates the next due date based on your preferences. Say goodbye to missed deadlines and confusion, and stay on top of your responsibilities effortlessly.
  • Automatic Reset: Enjoy a fresh start for recurring chores with Opus' automatic reset feature. Daily chores reset after midnight (or any hour you specify in "Preferences"). For weekly, monthly, or other recurring tasks, progress is reset based on customizable conditions for optimal efficiency. Check out the "Automatic Reset" section in the Help menu for more details.
  • Customizable Task Details: Tailor each chore to your specific requirements. Opus allows you to set start/end dates, reminders, progress tracking, and notes for every task. Personalize your tasks to suit your unique preferences and stay organized in your own way.
  • Multiple List Creation: Create multiple lists within Opus to categorize tasks effectively. Whether it's chores at home, work-related tasks, or special projects, you can effortlessly manage them all in one app. Combine multiple lists in the "Due Date View" to have a comprehensive overview, sorted by due dates, for seamless task management.
  • Auto Sync: Opus offers the convenience of auto sync, ensuring your task lists are always up to date across multiple devices. With this feature, any changes made to your tasks or lists on one device will automatically sync and reflect on all your connected devices.
  • Share Lists with Other Users: Collaboration made easy! Opus enables you to share your task lists with other users, promoting teamwork and shared responsibility. Whether it's managing household chores with family members or coordinating tasks with colleagues, simply invite others to join your list and keep everyone on the same page. Enjoy effortless task delegation, real-time updates, and improved productivity with the ability to collaborate and share lists within the app.
 
Notes to current Chore Checklist app users:

You will need to register a new account in Opus – Task Helper. If you have the original "Chore Checklist" installed on your current device, the Ads in this app will be automatically removed after account registration. You can migrate your chores from the Chore Checklist app to the new app. Please see the “Backup and Restore” section below for more detail.

Key differences between the old Chore Checklist and Opus

Routines: Routines are no longer available in Opus. Instead, you can assign recurrence intervals at the task level. When migrating existing data, the routine intervals will automatically be moved to the tasks. If you used Routines to group or hide chores, consider reorganizing them into different lists before migrating to Opus.

Editing and Deleting: Opus doesn't have a long-press feature. To edit, delete, or access other options for an item, swipe it to the left and click on one of the icons. For more details, refer to the "Edit/Delete/Skip Task" section below.


Login/Sign up

To login/Sign up, click “LOGIN/SIGN UP” button the top right of the home screen. You can sign in with Google or sign up using email/password.

image  image

Once you are registered, it will automatically create a sample task list for you and take you to the Home screen which is the “Due Date View”.

Home(“Due Date View”)

Once you logged in, the app will open the Home screen which sort the tasks by their due date. Depending on the settings, it may not show all the tasks. For example, it doesn’t show completed daily tasks or one time tasks. This app allows you to create multiple lists. You can choose which lists should be displayed on the home screen. To edit the lists or see all the tasks, click on the edit icon imageon the top right.

When you check off a task, a “Undo” toast will be displayed at the bottom of the screen. When you undo the change, it will reverse the due date and finish date back to what they were before. If you missed the popup, you can go to the “Edit Tasks” view to uncheck the task.

New in 1.1.2, you can now search across all your lists. Click on the 3 dot icon and then select “Search” from the popup menu, it will open the search view.

image image

Create/Edit Task List

In “Edit Tasks” view, you can create a new task list, set default list, change the visibility of a list on the home view, rename or delete a list. You can also share the list with other users.

image  image

Automatic Reset

Daily task will be reset everyday. That is if you checked some items today, they will be unchecked automatically after midnight and advance the due date.

You can change the auto reset time to any hour other than midnight in "Settings". For example, you can set the "Auto-Reset" time to 3am if you don't want the chores to be reset until 3am

By default, non-daily recurring tasks will not auto advance their due date if they are overdue. But you can check the “Reset progress automatically” checkbox if you don’t want them to stay in overdue status.

Finished non-daily recurring tasks will be automatically unchecked based on the following two options

1) Due date is calculated from previous due date

If you finish a task before its due date, then it will be unchecked when the due date is passed;

If you finish a task on its due date, then it will be unchecked when it is half way towards the next due date;

If you finish a task after its due date but choose "Yes" when prompted "If you complete it for previous cycle", then the task also will be unchecked when it is half way towards the next due date.

2) Due date is calculated from completion date

A task will be unchecked when it is half way towards the next due date.


Add New Task

To add a new task, click the image icon on top right of the Home screen.

It will open the task editor and prompt you to enter name and notes. You can configure the reoccurrence for repeating tasks.

image

Notes to the old Chore Checklist users:

The day patterns used to be on the daily chores. Now they have been moved to be under weekly tasks(see the screenshot above)

Edit/Delete/Skip Task

To edit an existing task, swipe the task name to the left or right. There are options to edit the task, skip the next due date, make the task active/inactive and delete the task.

image image[70]  image


When you swipe a task to the left, you will see the following icons:

image  Edit Task. (New in v1.1.5: If you have more than 15 completed active one-time tasks in all your lists, it will display a badge with the count of the tasks on this icon. It is a reminder that it is time to clean them up)

image  Skip the next due date. When skipping a one time task, the system will automatically add one day to the current due date. For example, if it is due today, when you click on the skip icon, it will change the due date to tomorrow.

image  Check off tasks with calendar popup. By default, when you check off a recurring non-daily task, it will popup a calendar for you to pick the completion date. If you don’t want to be prompted, you can turn the “Prompt for completion date” option off in the “Account” view. When you check off a task, it will set the completion date to today automatically. This icon is there in case you do want to pick a different date, you can click on this option button to check off tasks.

image  Delete Task


When you swipe a task to the right, you will see the following icons:

image  Move the item to another list. This icon only show up when you have multiple lists.

image image  Toggle a task’s priority between high and normal

image image  Mark a task as active or inactive


Edit Vacation

Click on the 3 dot icon on the top right and select “Edit Vacation” from the popup menu. It will open the vacation detail view. Enter your vacation start and end dates, and the app will automatically skip your daily tasks during that time.

image  image

Search Lists

To search tasks across all your lists, click on 3 dot icon on the top right and select “Search” from the popup menu. It will open the search view. If you check the “Inactive Tasks Only” checkbox, it will display all the inactive tasks. You can then search tasks among them.

image  image

Export List

You can export tasks from the Home view or the “Edit Task” view. The tasks exported from the Home view will be sorted by the due date. The tasks exported from the “Edit Task” view will be grouped by their recurrence interval. Click on the 3 dot icon on the top right and select “Export List” from the popup menu. It will allow you to text, email or save the tasks in plain text format using preferred apps.

image

Widget(Android Only)

On Android phone, you can add widget to the home screen. It will ask you to sign in the first time when you add it. Once you are signed in, click “Continue”. If you have more than one list, it will prompt you to select one or more lists. Otherwise, it will load the default list and add the widget. You can also enable dark theme for widgets by check the “Dark Theme” checkbox above the “Continue” button.

image image image

In the widget, you can check off tasks and click on the “Refresh” icon on the top left corner to save the changes. You can also press the title bar to open the app. There is shortcut for adding one-time tasks. Click on the “+” icon on the top right corner. It will open the “Add One-time Task” view.

Share Lists Between Users

To share a list with another user, click “Menu”->”Edit/Share List”. Then click the “+” on the right of “List Sharing” label(see the screenshot above). Enter the email address of another registered user.

image

An invitation will be sent to the other user. He/She will receive a notification on the “Account” tab in the app. They can choose to accept or delete the invitation. Once the user accepts the invitation, he/she will be able to see your list under his/her login. You can stop list sharing by delete the user from the “List Sharing” under “Edit/Share List”.

image


Account View

To edit user preferences, sign out or delete the account, click on the image icon on the top left and then select “Account” from the menu. Please note, if you want to delete your account, you will be prompt to sign out and sign in again to refresh the credential.

There are many preference options including enabling dark theme, color customization and other display settings. Please note, the screenshot below maybe outdated as we continue adding more options.

image

Backup and Restore(or Migration)

To backup and restore a list, click on the image on the top left and then select “Backup & Restore” from the menu. It will save the lists to the local storage on your browser or device.

image

On an Android device, if you have the previous Chore Checklist app(lite or full) installed, the new app will display the button “Migrate From Chore Checklist” to allow you to migrate your lists from those apps.

image

For Android 10 and below, the app will try to navigate to the list folder the Chore Checklist(lite or full) is using. You should see the following screen after clicking on “Migrate From Chore Checklist” button. You can then click on the list you want to migrate and click on “Select” button on the top right to select the list.

image

For Android 11 and above, you will have to first use the “Backup and Restore” feature in the old Chore Checklist app to backup your lists to a folder which can be accessed by the new Opus app. It is recommended to save your lists to the “Documents” or “Download” folder. When you click on the “Migrate From Chore Checklist” button, it will open the file picker which should look like the screenshot below. You can then navigate to the folder containing the backup and select the list file you want to migrate.

image

After selecting the file, you will be prompted to check the content and then click on the “Confirm” button to complete the migration. You can also select multiple files and migrate them all at one time.

image

Sometimes if you don’t see your list after the migration, you might need to kill and restart the app.

Offline Mode

In version 1.1.0 and above, the app allows usage without an internet connection, with certain limitations. You can edit/add/delete tasks, but not add/delete a list. Certain menu items will also be disabled. On Android devices, when the device is offline, the changes made in a widget will not be synced to the app and vice versa. Any modifications made are saved locally and synchronized once the device regains online connectivity.

Where To Find the Apps

Web Site:

http://opus.dotnetideas.com

Google Play Store:

https://play.google.com/store/apps/details?id=com.dotnetideas.opus

Apple App Store:

https://apps.apple.com/us/app/opus-task-helper/id6450875277

Contact Us

Please feel free to contact us at support@dotnetideas.com if you have any questions or feedback. Thank you!

Packing List 2 User Guide

July 1, 2022 at 6:31 PMAdministrator
Get organized, pack smart with Packing List 2. Your travel essential.

Introducing Packing List 2, the revamped edition of the Packing List. Just like the original Packing List, you can easily create and customize packing lists for any trip, whether you're heading to the beach, hitting the slopes, or jetting off on a business trip.
With a simple and intuitive interface, Packing List 2 allows you to quickly add and remove items from your list, and easily organize them into categories such as clothing, toiletries, and electronics. You can also create multiple lists for different types of trips, and save them for future use.
But that's not all! Packing List 2 also offers helpful features such as group items by luggage or locations, and the ability to share your lists with friends and family. And with automatic syncing across all your devices, you can access your packing lists anytime, anywhere.
Whether you're a frequent flyer or a first-time traveler, Packing List 2 is the perfect tool to help you stay organized and stress-free.

Features:
    • Pre-loaded master templates
    • Create new list from scratch or generate from templates or existing one
    • Support Multiple lists
    • Mass change for easy editing
    • Group by luggage/locations for easy packing
    • Data are automatically synced to the cloud so it can be accessed from multiple devices
    • Share lists between users
   
Notes for the old Packing List - full app users:
You will need to register a new account in Packing List 2. If you have the original "Packing List - full" installed on your current device, the Ads in this app will be automatically removed after account registration. You can also migrate your lists from the old app to the new app. Please see “Backup and Restore” section below for more detail.

Login/Sign up

To login/Sign up, click “LOGIN/SIGN UP” button the top right of the home screen. You can sign in with Google/Apple or sign up using email/password.

image  image

Creating New List

To create a new list, click the image icon on top right of the Home screen.

image

It will open the list editor and prompt you to enter name, notes, departure/return dates, destinations and flight information. You can also change the list status to be “Active” or not. In the home screen, you can then choose to display active lists only.

image

To see the options for a list, swipe the list name to the left. There are options for editing the list header, checking the flight information or weather, changing the list status, deleting the list or sharing the list. We will explain the list sharing feature later in this guide.

image

Add New Item

Once a list is created, it will automatically send you to the detailed view of the list. You can start adding items by clicking on floating “+” icon at the bottom of the screen or the 3 dots menu icon and then clicking “New Item” from the popup menu. You can also click on the “+” on the right of the category name to add an item to that category.

imageimage  image

"Name" and "Category" are required fields. You can select a category from the drop down or add a new one by clicking on the “+” icon on the right.

To add multiple items at once to a category, click on image icon on the right of the category name and enter the items in the popup dialog.

image

Import Items

To import items from preloaded templates or any of your lists, open the list you are currently working on, click on the 3 dots icon on the top right. Then select "Import from templates" or “Import from my other lists” from the popup menu. It will open the import view. Select a template or list, pick the items you want and click on the save icon on the top right corner.

image  image

You can also import all items from multiple lists. Click on the image icon in the “Import from my other lists” view and select the lists you want to import.

Edit Items

To edit an existing item, swipe the item name to the left. There are options to edit the item, change the quantity of the item, mark the item active/inactive, mark/unmark the item as important and delete the item.

image


Check/Uncheck All and rename category

To check/uncheck all items under a category or rename the category, click on the 3-dot icon on the right of the category name and select the option from the popup menu.

image


Assign Luggage

A new feature introduced in this new app is now allowing nested luggage. You can add luggage containing other luggage. You will have a master list of your luggage. Then each packing list will have its own set of luggage. To edit the master luggage list, see the “Edit Metadata” section.

To assign luggage to a list, click on the 3 dots menu icon and then click “Edit Luggage” from the popup menu. You can add a listed piece of luggage from the master list, rename a luggage, add a nested luggage, delete luggage, or swap luggage. You can move nested luggage from one parent to another or add one luggage to another by dragging/dropping the luggage from its original location to its new parent.

Once you have luggage assigned for a list, a little green luggage icon will be displayed next to all the items. You can simply click on the icon and assign luggage for each item.

image   image   image

Group by Luggage

The items can be group by luggage. To open the group by luggage view, click on the image icon on the top right. Any items with no luggage assigned will be displayed at the bottom under “No Luggage Assigned”. If items has weight assigned, the total weight of a luggage will be calculated when you check off items and displayed under the luggage. If a luggage has weight, it will be added to the total weight as well.

image

Group by Location

The items can also be grouped by locations. Click on the 3 dots menu icon and then click “Group by Location” from the popup menu. Any items with no location assigned will be grouped together at the bottom of the list. You can simply click on each item and pick the location from the popup list.

image

Edit Metadata

To edit metadata such as the categories, luggage and locations, click on the image icon on the top left and then select “Metadata” from the menu. Then you can choose the metadata type from the drop down and start editing them. If you delete a metadata, the value will be cleared from all the items associated with that metadata.

New changes in v1.0.4, you can now assign weight to a luggage. It will be added to the total weight in the group by luggage view.

image  image image


Mass Change

To make changes on multiple items, click on the 3 dots menu icon and then “Mass Change” from the popup menu. It will display items you are able to edit. You will select the items you want to change, then click on the icon on the top right to enter the values. You can also delete multiple items here by clicking on the trash bin icon on the top right.

image  image

Export List

To export the items in a list, click on the 3 dots menu icon and then “Export List” from the popup menu. You can then choose to text, email or save the items in plain text format using preferred apps.

image


Share Lists Between Users

To share a list with another user, swipe the list name to the left and click on the image icon.

image

Then click on the “+” icon on the top right to enter the email address of another registered user.

image   image

An invitation will be sent to the other user. He/She will receive a notification on the “Account” tab in the app. They can choose to accept or delete the invitation. Once the user accepts the invitation, he/she will be able to see your list under his/her login. You can stop list sharing by delete the user from the “Share List With” view.


Backup and Restore(or Migration)

To backup and restore a list, click on the image on the top left and then select “Backup & Restore” from the menu. It will save the lists to the local storage on your browser or device.

On an Android device, if you have the previous Packing List app(lite or full) installed, the new app will display the button “Migrate From Packing List” to allow you to migrate your lists from those apps.

Here is a video tutorial on how to migrate your lists.

image  image

For Android 10 and below, the app will try to navigate to the list folder the Packing List(lite or full) is using. You should see the following screen after clicking on “Migrate From Packing List” button. You can then click on the list you want to migrate and click on “Select” button on the top right to select the list.

Screenshot_1677285891

For Android 11 and above, you will have to first use the “Backup and Restore” feature in the old Packing List app to backup your lists to a folder which can be accessed by the new Packing List 2 app. It is recommended to save your lists to the “Documents” or “Download” folder. When you click on the “Migrate From Packing List” button, it will open the file picker which should look like the screenshot below. You can then navigate to the folder containing the backup and select the list file you want to migrate.

Screenshot_1677288709

After selecting the file, you will be prompted to check the content and then click on the “Confirm” button to complete the migration.

Screenshot_1677288967

You can also select multiple files and migrate them at once.

Sometimes if you don’t see your lists after the migration, you might need to kill and restart the app.

Account View

To edit user preferences, sign out or delete the account, click on the image on the top left and then select “Account” from the menu. In the preferences section, you can enable dark theme, switch the weight unit and etc.

Please note, if you want to delete your account, you will be prompt to sign out and sign in again to refresh the credential.

image

Offline Mode

In version 1.1.0 and above, the app allows usage without an internet connection, with certain limitations. Any modifications made are saved locally and synchronized once the device regains online connectivity.


Where To Find the Apps

Web Site:

http://packinglist.dotnetideas.com

Google Play Store:

https://play.google.com/store/apps/details?id=com.dotnetideas.packinglist2

Apple App Store:

https://apps.apple.com/us/app/packing-list-2/id1671080832

Contact Us

Please feel free to contact us at support@dotnetideas.com if you have any questions or feedback. Thank you!

Posted in: Packing List | User Guide

My Party Planner User Guide(Android)

August 30, 2013 at 3:39 PMAdministrator


My Party Planner helps you plan parties and events. It has four sections: "TO DO", "Guest", "Menu", "Shopping" and "Budget" in addition to general information.

It automatically sorts TO DOs by due date/time and allows you to set reminder on them. It also allows you to import guests from contacts on your phone and manage RSVPs. While planning the menu, user can enter to-do and shopping items for a specific dish. So on the to-do list or shopping List, user can easily see which dish the item is for. User can also search recipes on the Internet and save the web address for future reference. 

Key features include:

  • Sorted to-do list shows how long until event date/time for easy planning
  • Import guests from contacts and quick call/email access within the app
  • Assign to-do, shopping items and guests when planning the menu
  • Quick look up for recipes and save recipe's url for future reference.
  • Create similar event by copying from existing event

Features in full version only:

  • Email whole event or just one of the to-do, guest, menu, shopping lists and budget to others
  • Change start time for multiple to-do items
  • Set reminders for multiple to-do items


Video Tutorial


Screenshots
mypartyplanner_screenshot12mypartyplanner_screenshot2mypartyplanner_screenshot7mypartyplanner_screenshot3mypartyplanner_screenshot8mypartyplanner_screenshot4mypartyplanner_screenshot9mypartyplanner_screenshot5mypartyplanner_screenshot10mypartyplanner_screenshot6mypartyplanner_screenshot11


Event List View

New Event

To add a new event, click on "Menu"->"New Event". Enter the name of the event and then enter detail info in the event detail view.

Edit Event

To edit an existing event, tap on the event. It will open up the event detail view. See detail info below under "Event Detail View".

Rename Event

To rename an event, long press the event's name and click on "Rename Event" from popup menu. Enter a new name and click on "OK".

Delete Event

To delete an event, long press the event's name and click on "Delete Event" from popup menu.

Copy Event

To create a new event from an existing event, long press the existing event's name and click on "Copy Event" from popup menu. Enter the name for the new event and click on "OK".

Backup and Restore List

To backup all events, click on "Menu"->"Backup and Restore"->"Backup". Then click on "Backup" to use the default folder or "Select Folder" to choose different location.

To restore all events, click on "Menu"->"Backup and Restore"->"Restore". It will open default backup location. Choose the folder which contains backup files and click on "Restore". If you have chosen different backup location, then navigate to that location and click on "Restore".

You must use "Backup and Restore" feature to recover data if you need to un-install/re-install the app or upgrade from lite to full version.

Edit Helper

Since 2.0.0, user can assign TO-DO tasks to helpers. To edit helpers, click on "Menu"->"Edit Helper" in Event List View. The helpers will be available to all events.

To add helper, enter a name in the edit text box at bottom of the Edit Helper View and click on "Add". To delete or rename a helper, long press the helper's name and click on "Delete" or "Edit" from the popup menu.

Edit Unit

This app comes with a list of units used in Shopping Items. You can edit them by click on "Menu"->"Edit Unit" in Event List View.

To add unit, enter a name in the edit text box at bottom of the Edit Unit View and click on "Add". To delete or rename an unit, long press its name and click on "Delete" or "Edit" from the popup menu.

Event Detail View

Tap on a event, it will open the event detail view. It consists of 5 tabs: Home, TO DO, Guest, Menu and Shopping.

Home Tab

Home tab displays general information about the event. User can edit date time, location and notes. It also shows the guest info and next to-do item.

TO DO Tab

TO DO tab displays to-do items sorted by due date/time. If a to-do is for a dish, the name of the dish will be displayed along with due date. It also displays how long it is until the event date/time.

To add a new to-do, click on "Menu"->"Add". The item detail view will show up. User can enter name, due date (in format of how long until event date/time), duration, notes and dishes.

Since version 1.2.0, user can enter start time in addition to due date/time. "Start Time" is the time of a day this item needs to be started. It is not required. But if you do set it, then you can't set the relative due date/time to number of hours or minutes.

For example, if you have event/party date time set to June 15th, 2014 at 6pm, below shows you how the item's due date/time is calculated based on user input.

Due Date/Time Start Time Calculated Due Date/Time
2 weeks   June 1st, 2014
3 days   June 12th, 2014
3 days 7pm June 12th, 2014 at 7pm
5 hours   June 15th, 2014 at 1pm
45 minutes   June 15th, 2014 at 5:15pm
0 hours 5:30pm June 15th, 2014 at 5:30pm

To change start time for multiple items, click on "Menu"->"Change Start Time". Only items with start time set will be available in the multi-choice popup dialog. You can only move the time within the same day. If the calculated new start time is on another day, the app will not change it. This feature is in full version only.

Due date/time, start time and duration can also be edited by click on the due date/time display on the right side of each item.

Since v2.0.0, user can assign helper to a task. Just choose a helper from the drop down list under "Assign To". To edit helpers, go back to "Event List View" and click on "Menu"->"Edit Helper". You can insert/edit/delete a helper there.

To edit an existing to-do, click on the name of the item. Then edit it in the item detail view.

If you only want to edit due time, you can press the time to open the quick due date/time edit dialog.

To delete an existing to-do, long press a to-do item and click on "Delete" from popup menu.

To hide/show completed to-dos, long press any item and click on "Hide/Show completed TO DOs" or click on "Menu"->"More"->"Hide/Show completed TO DOs"

To set reminders for multiple items, click on "Menu"->"Set Reminder" and choose items from multi-choice popup dialog.

Guest Tab

Guest tab displays guest list sorted by name. It also shows how many adults and kids under each guest and RSVP info.

To add a new guest, click on "Menu"->"Add". The item detail view will show up. User can enter name, phone number, email or import from contacts on the device. User can also enter number of adults and kids under each guest, RSVP and notes. There are also call and email buttons for quick call and emailing to the guest.

To edit an existing guest, click on the guest's name. Then edit it in the item detail view.

To delete an existing guest, long press a guest and click on "Delete" from popup menu.

Menu Tab

Menu tab displays menu for the event. It also shows to-do items if there are any. Clicking on browser icon opens up web browser view for quick look up of recipe if recipe url is saved for the dish.

To add a new dish, click on "Menu"->"Add". The item detail view will show up. User can enter name, type and notes. User can also add shopping items and to-do items for the dish. There is a quick access button to automatically search recipe on the Internet for this dish. User can save the URL for future reference.

Since 2.0.0, user can also assign dishes to guests.

To edit an existing dish, click on the dish. Then edit it in the item detail view.

To delete an existing dish, long press a dish and click on "Delete" from popup menu.

Shopping Tab

Shopping tab displays shopping list for the event. It also shows the dishes if a item is for particular dishes.

To add a new shopping item, click on "Menu"->"Add". The item detail view will show up. User can enter name, quantity, unit, notes and dishes.

To edit an existing shopping item, click on the item. Then edit it in the item detail view.

To delete an existing shopping item, long press an item and click on "Delete" from popup menu.

To hide/show items bought, long press any item and click on "Hide/Show Bought Items" or click on "Menu"->"More"->"Hide/Show Bought Items"

Budget Tab

Budget tab displays estimated and actual costs for the event. You can enter either total costs or cost per person. If you enter cost per person, the app will automatically calculate the total costs by following rules:

total estimated costs = estimated cost per adult * number of total adults invited + estimated cost per kids * number of total kids invited

total actual costs = actual cost per adult * number of total adult coming + actual cost per kids * number of total kids coming

To add a new budget item, click on "Menu"->"Add". The item detail view will show up. User can enter name, estimated costs, actual costs, and notes.

To edit an existing budget item, click on the item. Then edit it in the item detail view.

To delete an existing budget item, long press an item and click on "Delete" from popup menu.

Send Event (Full version only)

User can send whole event or just one of the to-do, guest, menu, shopping list and budget to others.

To use this feature, open an event and click on "Menu"->"Send Event".

Mass Copy

To copy multiple items from one event to another, navigate to the "TO DO", "Guest", "Menu", "Shopping" or "Budget" tab in the original event. Click on "Menu"->"Mass Copy". It will display all items in that tab in the popup dialog. Check the items you want for another event and click on "COPY TO EVENT". Then click on the destination event from popup list.

Settings(some of the options are full version only)

Go to "Menu"->"Settings". Users can choose theme, customize text size, background and text colors.

Chore Checklist User Guide(Android)

August 28, 2013 at 6:49 AMAdministrator


Video Tutorial

Screenshots
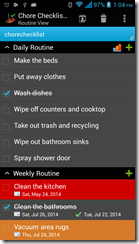
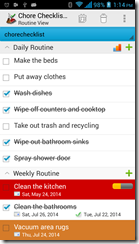
chorechecklistfull_screenshot1chorechecklistfull_screenshot8chorechecklistfull_screenshot7chorechecklistfull_screenshot6chorechecklistfull_screenshot5chorechecklistfull_screenshot4chorechecklistfull_screenshot3chorechecklistfull_screenshot2

User Guide

Routine View

In this view, user can manage lists by routines. It is opened by default when click on the app icon. User can change it to open "Due Date View" by default in Settings.

Manage Lists

To create a new list, click on "Menu"->"More"->"Manage Lists..."->"New List".

To delete a list, click on "Menu"->"More"->"Manage Lists..."->"Delete List".

To rename a list, click on "Menu"->"More"->"Manage Lists..."->"Rename List".

To email or backup a list, click on "Menu"->"More"->"Manage Lists..."->"Send List/Backup List". Check the "Backup and Restore Lists" at the end of this help for more info.

To email a list for chores overdue or due on certain day, click on "Menu"->"More"->"Manage Lists..."->"Send Chores Overdue" or "Send Chores by Due Date"

Add Routine

To add new routines, click on "Menu"->"New Routine". You may enter frequency which is how often you want to do the chores under this routine. For example, you can set the routine as every 2 days, every 2 weeks, every 3 months and etc.

Edit/Delete Routine

To edit/delete a routine, press and hold its name. Choose "Edit"/"Delete" from the popup menu. You may also set the completion date, due date and reminder for all the existing chores on a routine. The display options allow you to select which routine will be displayed in widget and will always expanded in the list.

Add Chore

To add new chore under a routine, press and hold a routine, then select "New Chore" from pop-up menu.

Edit/Delete Chore

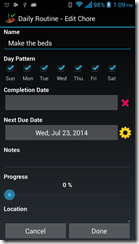
To edit/delete a chore, press and hold it's name. Choose "Edit"/"Delete" from the popup menu. You may edit the name, notes, progress, location and etc.

You can change how it calculates the next due date. It defaults to use previous due date. That is if you have a weekly chore set to be done on every Sunday. The next due date will always be on Sunday. You may choose to calculate base on the completion date. So if you finished it on Tuesday, the next due date will be next Tuesday, not Sunday.

You may clear the completion date. You may also clear the due date if the chore is not under repeating routine. For chores under repeating routine, you cannot clear the due date since it is system calculated.

If you entered notes for a chore, an information icon will be displayed on the list view. To get a quick view of the notes, you may touch the icon, a toast window will show up with the notes.

If the progress is set, a progress bar will also show on the list view.

Since v2.3.0, users can enter optional start/end date for a chore. The chore will only be active with the start/end date. To show/hide start/end date, click on the "Setting" icon on the right of Due Date button.

To copy/paste a chore, long press the chore and then choose "Copy"/"Paste" from the popup menu.

To move a chore from one routine to another, long press the chore. Click on "Move To Routine..." from popup menu and choose the destination routine.

Move Chores Between Lists

To move a chore from one list to another, long press the chore and click on "Add To Existing List" in popup menu and choose a list.

To move a routine from one list to another, long press the routine and click on "Add To Existing List" in popup menu and choose a list.

Complete/Skip Chore

When check off a daily or one-time chore, the completion date will be set to today. When check off other type of chores, a date selection window will popup to have you enter completion date. If the chore has a reminder, it will be re-calculated based on the next due date.

If a chore has passed its due date, you may choose to skip the chore instead of completing it. Tap and hold the chore. Choose "Skip" from popup menu. It will re-calculate the next due date without changing the completion date.

Day Patterns For Daily Routine(Full Version Only)

For chores under daily routine, you can now set which day of the week the chores need to be done. For example, you can choose only the weekdays or weekends, etc.

The day pattern will be displayed on the list view when it is set.

Set Reminder

For chores under daily routine, you can set the reminder to specific time of a day. It will automatically repeat daily. For other routines, the reminder will be set to relatively to the due date or specific time on the due date. It will not repeat until you complete/skip the chore. A clock icon will show on the list view when a chore has reminder set up. You may tap the icon to see what time is the reminder set to.

Since version 2.0, users are allowed to create multiple lists. To enable reminder in multiple lists, click on "Menu"->"More"->"Settings..."->"Enable Reminder For Lists".

Re-Order Chores/Routines

To re-order the chores under a routine or move chores across routines, click on "Menu"->"Sort by..."->"Sort Manually" and touch the icon on the left of a chore. Start dragging the chore and drop it to desired place. You may also drag it to another routine.

To re-order the routines, first collapse the list. Click on "Menu"->"Sort by..."->"Sort Manually" and touch the icon on the left of a routine. Start dragging the routine and drop it to desired place.

You can sort the chores alphabetically, by due date or by location.

Automatic Reset

Daily routine will be reset everyday. That is if you checked some items today, they will be unchecked automatically after midnight.

(Full version only: You can change the auto reset time to any hour other than midnight in "Settings". For example, you can set the "Auto-Reset" time to 3am if you don't want the chores to be reset until 3am)

Chores in other recurring routines will be automatically unchecked based on the following two options

1) Due date is calculated from previous due date

If you finish a chore before its due date, then it will be unchecked when the due date is passed;

If you finish a chore on its due date, then it will be unchecked when it is half way towards the next due date;

If you finish a chore after its due date but choose "Yes" when prompted "If you complete it for previous cycle", then the chore also will be unchecked when it is half way towards the next due date.

2) Due date is calculated from completion date

Chore will be unchecked when it is half way towards the next due date.

Show Overdue & Due Today

To display chores overdue and due today only, click on "Menu"->"More"->"Show Overdue & Due Today". To change it back, click on "Menu"->"More"->"Show All Chores".

Hide Completed Chores

To hide completed chores, click on "Menu"->"More"->"Hide Completed Chores". To change it back, click on "Menu"->"More"->"Show Completed Chores".

Backup and Restore List

To backup all lists, click on "Menu"->"Backup and Restore"->"Backup". Then click on "Backup" to use the default folder or "Select Folder" to choose different location.

To restore all lists, click on "Menu"->"Backup and Restore"->"Restore". It will open default backup location. Choose the folder which contains backup files and click on "Restore". If you have chosen different backup location, then navigate to that location and click on "Restore".

You must use "Backup and Restore" feature to recover data if you need to un-install/re-install the app or upgrade from lite to full version.

Reports (Full version only)

When you check off a chore, the app will save the completion date to reports. The reports are grouped by routines.

To view the reports, click on "Menu"->"More"-"Reports...". Choose a routine.

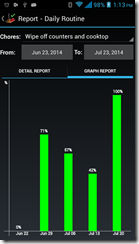
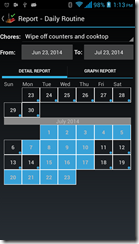
Daily routine will have calendar like report as well as graph report. You choose a chore from dropdown list on the top. Since the app auto reset daily chore everyday, you may not be able to record a completion date in time. This report gives you a chance to record past completion date. You can tap on a day to set the completion date or to clear it.

Since v2.3.0, users can also view last 30 days of completion report for daily chores in Routine View. Just tap the graph icon on the right of the daily routine(next to "+" icon) to show and hide it. If you have many daily chores, please consider only show the report when it is necessary since it will affect the performance of the app.

The reports for other routines will only display the completion date along with due date. You will not be able to change them.

You can export/email reports by click on "Menu"->"More"->"Export/Email Reports". It will generate text report in the email body and a CSV file which you can view it in Excel.

Sync And Share Lists (Full version only with separate purchase of Cloud Connector)

To use this feature, you will need to purchase "Chore Checklist Cloud Connector" and register on our web site first.

To login, click on "Menu"->"Sync List"->"Login".

To upload a new list or sync an existing list, open the list first in app view. Then click on "Menu"->"Sync List"->"Sync/Upload List". Your list will be uploaded to our server and your changes will be merged with other changes on the server since your last download/upload.

To download a list, click on "Menu"->Sync List"->"Download List". The app will retrieve all the available lists from server and allow you to choose which one you want to download. A shared list will have the owner's name next to the list name. Users can share and update the same list. Note: if you haven't upload your changes to the server, they will be lost if you download the same list again.

You can now enable auto-sync for lists. Click on "Menu"->"Sync List"->"Enable Auto-Sync For Lists" and choose the lists you want. The auto sync will happen when you start up the app and when you leave the app.

Settings(Full Version Only)

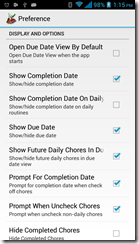
There are several settings under Menu->More->Settings...

You can also change the starting day of a week if you are using day patterns for daily routine. It defaults to Sunday.

There is a setting to show/hide the soft keyboard when opening the chore detail view.

Since 1.5.0, user can choose reset time instead of using the default one which is midnight. By default, all the daily chores will be unchecked after midnight. Now you can set it to 1 AM, 2 AM and etc.

There are also settings for default alarm ringtone and background colors.

Since 2.2.0, user can choose dark or light theme on Android 3.0+.

Due Date view

In this view, chores are sorted by due date. You are able to combine lists in due date view. Click on "Menu"->"Choose List", check the lists you want to display in due date view. If you want, you can also set the due date view as default view. So every time when you start the app, it will open due date view by default. This settings is in "Menu"->"More"->"Settings..."->"Settings"

Edit Chores

In this view, long press a chore, you can choose to edit the detail of a chore.

Since 2.2.0, there are some shortcut options added for one-time chores. User can quickly add one-time chore by click on "Quick One-Time Chore" menu item. The app will prompt user to choose a list and a routine for the chores to be added to the first time. You may change it by click on "Menu"->"Settings"->"Change Quick One-Time Routine"

You can quickly "Set Due Date To Today", "Clear Due Date" and "Delete Chore" if the chore is one-time chore/task.

Sync Lists (Full version with Chore Checklist Cloud Connector only)

Syncing lists in due date view will sync all opened lists in this view.

Progress and Timer

In Due Date View, long press on a chore, you will be able to access "Progress and Timer" popup which allow you to time your work and set progress easily.

Note: Some phones have issue loading the widget since we added the widget customization in v1.4.3(Full). If it happens, you may go to "Menu"->"More"->"Settings" to turn off widget customization. Unfortunately, you won't be able to change the widget style in that case.

Widget

On Android 1.5-2.3.7, this application has one widget in lite version and three different size widgets in full version.

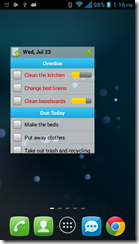
New in 2.2.0: On Android 3.0+, this application provides a scrollable/resizable interactive widget for both lite and full version. User can check off chores and quickly add one-time chores from widget. When check off chores in widget, please make sure to save the changes by clicking the save button on the top-left corner of widget.

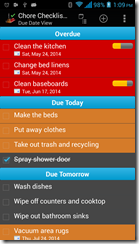
The widget displays all the chores in Due Date View sorted by due date. Overdue chores are on the top, followed by chores due today and due later.

Since 2.3.0, user can choose to hide chores due more than certain number of months in widget.

Edit List On Desktop

We provide free online editor at www.dotnetideas.com for users who purchased the full version and cloud connector.

Grocery Helper User Guide(Android)

August 7, 2013 at 3:05 PMAdministrator
 

Video Tutorial


Screenshots
groceryhelper200_screenshot1groceryhelper200_screenshot3groceryhelper200_screenshot4groceryhelper200_screenshot2groceryhelper200_screenshot5groceryhelper200_screenshot6groceryhelper200_screenshot7


User Guide


Inventory List View

 
Create New List

This app comes with two pre-loaded grocery lists. One is for food related items and another for non food items. You may edit them to fit your needs or you can create a new one.

To create a new list, click on “Menu”->”More”->"Manage List"->”New List” and enter the list name.

Add Category

To add category, click on “Menu”->”New Category”. Or if you have the quick edit box showing at the bottom,  collapse any category or collapse all, the button at the bottom will say “Add Category”. You can then enter a name and click on “Add Category” button to add a category.

Add Item

To add item under a category, press and hold the category and choose “New Item” from the popup menu. Or if the quick edit box is showing at the bottom, you may expand the category, the button at the bottom will change to “Add Item”. Enter the name of the item and click on “Add Item”.

Edit/Delete existing Category/Item

To edit/delete a category/item, press and hold the category/item until the menu popup. Choose corresponding menu items to complete the action. You may edit the name, quantity, location and luggage for each item.

Move/Re-order Items

To move an item from one category to another, press and hold the item until the menu popup. Choose “Change Category” and select a new category for the item.

You may also drag/drop item within category or across categories. Touch the empty space on the left of the check box, start to drag the item and drop it at desired place.

Re-order Categories

To re-order categories, touch the very left of a category and drag/drop it to desired place.

Mass Change (full version only)

Mass Change helps to apply the same edit to multiple items. Click on "Menu"->"Mass Change..." to enter mass change mode.

Once you are in Mass Change mode, a little panel with three buttons will show up at the bottom of the screen.

To quickly set quantity, store, location and unit for multiple items, check the items then click on "Mass Change". Make changes to the fields you want to edit in the popup window. Make sure the checkbox in front that field is checked and click "OK"

To delete multiple items, click "Delete" button and confirm in the prompt.

To move multiple items from one list to another, first check those items, then click on "Add Items to Existing List" and choose a list from popup window

Manage Inventory

This app makes inventory management much easier. You just tap on the inventory level icon on the right of each item. A popup window will display a row of inventory level icon from empty to full. Tap one of the icon to adjust the level. You may enter quantity if you want more precise number.

Since version 1.3.0, this operation is changed to use expandable panel by default. Instead of displaying a popup window, the app will display a blue panel with 5 inventory level icons. You can change it back to popup window through "Menu"->"Settings..."->"Settings"->"Use popup dialog for prompt"

Select Low Stock Items

In Inventory List View, you can quickly select all items which stock level is under certain percentage (e.g. 25%, 50%) in order to generate Shopping List for them.

Check Expiration Date

The first time you open Inventory List in a day, the app will check if there are items expired or about to expire and show them to you. You can review them by clicking on "Menu"->"Check Expiration Date" in Inventory List at any time.

Generate Shopping List

From the inventory list, you can check off items to generate the shopping list.

Check the items you want to add the shopping list. You will be prompt to enter the shop quantity and store. If you don't want to be prompt for every item, you can check "Do not ask again". This setting can be changed in "Settings".

Click on "Menu"->"Generate Shopping List". If a shopping list already exists, you will be prompt to either overwrite it or update it. Overwrite will clear the current shopping list and add the new items. Update will only add the new items and leave the existing items unchanged.

Shopping List View

Shopping List View is similar to Inventory List View. You can add new list, delete/edit list the same way. You can also add/edit/delete/re-order categories and items.

Quick Add In Shopping List

To quickly add multiple items from existing inventory lists to current shopping list, click on "+" icon on the right side of a category. It will list all items under that category in Inventory List. Check the items you want to add to current shopping list and click on "OK".

Check Off Items In Shopping List

During your shopping trip, you can use the shopping list to reminder you the items you need to buy. When you check off an item, it will ask you to enter the store and price. They will be displayed in "Price history". If you don't want to be asked for each items, you can check "Do not ask again". You can always go to "Settings" to change it back.

Update Inventory From Shopping List

When you are done shopping, you may choose to update your inventory lists. Click on "Menu"->"Update Inventory List". It will update the quantity and price for each checked item in the shopping list. It will also ask you whether to delete checked items at the end.

Other Features Shared By Both Views

 
Group List By Location

To re-group list by locations, click on “Menu”->”More”->"Group by..."->”Group by locations”. You can check off items but you can not edit items in that mode.

Group List By Store

To re-group list by luggage, click on “Menu”->”More”->"Group by..."->”Group by Store”. You can check off items but you can not edit items in that mode.

Edit Location

To add/edit/delete locations, click on “Menu”->”More”->"Settings..."->”Edit Locations”. You can add new location, edit or delete them. There is one default location which you cannot delete it.

Edit Store

To add/edit/delete luggage, click on “Menu”->”More”->"Settings..."->”Edit Store”. You can add new store, edit or delete them. There is one default store which you cannot delete it.

Sync And Share List(Full version only)

To use this feature, you will need to purchase Grocery Helper Sync Provider and register on our web site www.dotnetideas.com first.

To login, tap the "Login" link on the main menu screen. After successful login, your user id/email will be displayed at the lower left corner of the main screen. To login using different account, tap the user id/email link.

To upload a list, open the list first. Then click on "Menu"->"More"->"Sync List"->"Upload List". Your changes will be merged with other changes on the server since your last download/upload.

To download a list, click on "Menu"->"More"->"Sync List"->"Download List". The app will retrieve all the available lists from server and allow you to choose which one you want to download. A shared list will have the owner's name next to the list name. Users can share and update the same list. Note: if you haven't upload your changes to the server, they will be lost if you download the same list again.

Email List

To send a list to someone, click on "Menu"->"More"->"Send List". You can choose to send it by email, text message or other tools. The list will be sent in simple text format content.

Settings

In "Menu"->"More"->"Settings..."->"Setting", you change and customize many options and colors.

Recover Master List

The application comes with two pre-loaded grocery lists. One for food related items and another one for non-food items. If you for any reason lost them, you may recover them by going to "Menu"->"More"-"Settings..."->"Recover Master List"

Edit List On Desktop

We provide free online list editor on our site at www.dotnetideas.com for users who purchased the full version and sync provider.

Posted in: Grocery Helper | User Guide

Packing List User Guide(Android)

August 5, 2013 at 1:29 PMAdministrator


Video Tutorial


Screenshots
packinglist_screenshot1packinglist_screenshot2packinglist_screenshot3packinglist_screenshot4packinglist_screenshot5packinglist_screenshot6packinglist_screenshot7

User Guide


My Lists View

Since 3.1.0, new properties were added to lists. Now user can add destination, departure/return dates and notes to a list. Those information is displayed under list name in "My Lists" view.

Create New List

To create a new blank list, click on “Menu”->”New List” and enter the list name.

Since v3.2.0, "Generate List" has been moved under "Mass Change". To generate new list from existing one, open the existing list first. Click on "Menu"->"Generate List/Mass Change". Check the items you want to add to new list and click on "Generate List" button.

If you want to duplicate a list, first enter "Mass Change Mode" by clicking on "Menu"->"Generate List/Mass Change". Then click on "Menu"->"More"-"Check All" to select all the items. Click on "Generate List" and enter name for the new list.

Edit List Properties

Tap and press a list, then click on "Edit" from popup menu. User can edit destination, departure/return dates and notes. Destination is semicolon-delimited field. For example, you may enter multiple destination as "Paris; London"(semicolon delimited);

Edit List Detail

Tap a list, it will open the list detail window. See detail below under "List Detail View".

Delete List

Tap and press a list, click on "Delete" from the popup menu to delete a list.

Rename List

Tap and press a list, click on "Rename" from popup menu and enter new name for the list

Backup and Restore List

To backup all lists, click on "Menu"->"Backup and Restore"->"Backup". Then click on "Backup" to use the default folder or "Select Folder" to choose different location.

To restore all lists, click on "Menu"->"Backup and Restore"->"Restore". It will open default backup location. Choose the folder which contains backup files and click on "Restore". If you have chosen different backup location, then navigate to that location and click on "Restore".

You must use "Backup and Restore" feature to recover data if you need to un-install/re-install the app or upgrade from lite to full version.

Email/Share List

To send a list to someone, click on "Menu"->"More"->"Send List". You can choose to send it by email, text message or other tools. The list will be sent in simple text format content as well XML format attachment. If the recipient has this application installed, he/she can use “Restore” feature to import the XML file into the app and start using it.

All the features above can be accessed from the list detail view as well. If you are in list detail view, click on "Menu"-"More"->"Manage List..." to access those menu items.

Check Weather(Full version only)

Tap and press a list, click on "Check Weather". If there are multiple destinations, a list of destination will show up to allow you to choose one.

All the features above can be accessed from the list detail view as well. If you are in list detail view, click on "Menu"-"More"->"Manage List..." to access those menu items.

Sync And Share Lists (Full version only with separate purchase of Cloud Connector)

To use this feature, you will need to purchase Packing List Cloud Connector and register on our web site  www.dotnetideas.com first.

To login, click on "Menu"->"Sync List"->"Login". If you haven't register, you can click on "Register" from the login view. Then follow the instruction to register.

To enable auto-sync for lists. Click on "Menu"->"Sync List"->"Enable Auto-Sync For Lists" and choose the lists you want. The auto sync will happen when you start up the app and when you leave the app.

To download a list, click on "Menu"->Sync List"->"Download List". The app will retrieve all the available lists from server and allow you to choose which one you want to download. A shared list will have the owner's name next to the list name. Users can share and update the same list. Note: if you haven't upload your changes to the server, they will be lost if you download the same list again.

Settings

Go to "Menu"->"Settings..."->"Settings", you can choose the option to display/hide inactive items, location, quantity, weight and other settings.

In paid version, users can also customize the background and text colors of the lists.

Edit Location

The application provides a pre-loaded location list. To add/edit/delete locations, click on “Menu”->"Settings..."->”Edit Locations”. You can add new location, edit or delete them. There is one default location which you cannot delete it.

Edit Luggage

The application also provides a pre-loaded luggage list. To add/edit/delete luggage, click on “Menu”->"Settings..."->”Edit Luggage”. You can add new luggage, edit or delete them. There is one default luggage which you cannot delete it.

Recover Master List

The application comes with a pre-loaded packing master list. If you for any reason lost it, you may recover it by going to "Menu"->"More"-"Settings..."->"Recover System List"


List Detail View

When click on a list from My Lists view, it will open up the list detail view.

Add Category

To add category, click on “Menu”->”New Category”. Or if you have the quick edit box showing at the bottom,  collapse any category or collapse all, the button at the bottom will say “Add Category”. You can then enter a name and click on “Add Category” button to add a category.

Add Item

To add item under a category, press and hold the category and choose “New Item” from the popup menu. Or if the quick edit box is showing at the bottom, you may expand the category, the button at the bottom will change to “Add Item”. Enter the name of the item and click on “Add Item”.

Edit/Delete existing Category/Item

To edit/delete a category/item, press and hold the category/item until the menu popup. Choose corresponding menu items to complete the action. You may edit the name, quantity, location, luggage, active indicator, unit weight and total weight for each item. When you edit one of the weight field, the app will automatically calculate the other field if you have quantity set.

Quick Quantity Editing (Full version only)

In paid version, you can tap on the little +/- icon on the right of an item to quickly increase/decrease the quantity.

Move/Re-order Items

To move an item from one category to another, press and hold the item until the menu popup. Choose “Change Category” and select a new category for the item.

To add items from one list to another, select the items and click on “Menu”->”More”->"Mass Change..."->”Add Items to Existing List”. Then choose the other list from popup list.

You may also drag/drop item within category or across categories. Touch the empty space on the left of the check box, start dragging the item and drop it at desired place.

Re-order Categories

To re-order categories, touch the very left of a category and drag/drop it to desired place.

Group/Sort by

To re-group list by locations, click on “Menu”->”More”->"Group by..."->”Group by locations”.

To re-group list by luggage, click on “Menu”->”More”->"Group by..."->”Group by luggage”.

You can check off and edit items in both modes.

You can also sort alphabetically or by packed or not.

At end of packing, you may want to hide packed items to easily find unpacked ones. Click on "Menu"->"Hide Packed Item". A warning label at bottom of the screen will remind you this mode.

Search

To find an item, click on "Menu"->"More"->"Search". A text box and "Find Next" button will show up at the bottom of the screen. Enter the word you search for and tap on "Find Next".

Mass Change

Click on "Menu"->"More"->"Generate List/Mass Change", the app will enter "Mass Change" mode. All the check boxes will be cleared. You check off the items you want to change and then click one of the three buttons at the bottom of the screen to edit their quantity/location/luggage, delete multiple items or copy them to existing lists. To exit "Mass Change" mode, click on "x" to close the "Mass Change" panel.

Since v3.2.0, "Generate List" has been moved under "Mass Change". To generate new list from existing one, open the existing list first. Click on "Menu"->"Generate List/Mass Change". Check the items you want to add to new list and click on "Generate List" button.

To set quantity, location and luggage, select items you want to change and click on “Mass Change” button and make changes in the popup window.

To move multiple items from one list to another, first check those items, then click on “Add Items to Existing List" and choose a list from popup window.

To delete multiple items,  check those items first then click on “Delete" button.

Sync And Share Lists (Full version only with separate purchase of Cloud Connector)

To use this feature, you will need to purchase Packing List Cloud Connector and register on our web site first.

To login, click on "Menu"->"Sync List"->"Login".

To upload a new list or sync an existing list, open the list first in app view. Then click on "Menu"->"Sync List"->"Sync/Upload List". Your list will be uploaded to our server and your changes will be merged with other changes on the server since your last download/upload.

To download a list, click on "Menu"->Sync List"->"Download List". The app will retrieve all the available lists from server and allow you to choose which one you want to download. A shared list will have the owner's name next to the list name. Users can share and update the same list. Note: if you haven't upload your changes to the server, they will be lost if you download the same list again.

Edit List On Desktop

We provide free online list editor on our site at  www.dotnetideas.com for users who purchased the full version and cloud connector. You will also find user guide and video tutorial there.

Posted in: Packing List | User Guide

Travel Phrases User Guide(Android)

July 22, 2013 at 3:07 PMAdministrator


Screenshots

travelphrasefrench200_screenshot1travelphrasefrench200_screenshot2travelphrasefrench200_screenshot3travelphrasefrench200_screenshot4

User Guide

This user guide is for Travel Phrases – French, but you will find the same features in our other Travel Phrases apps.

Pronunciation

To listen to the pronunciation of a phrase, tap the French phrase or the pronunciation part. You will need to have Text-To-Speech English installed and enabled. Pico TTS is a typical TTS engine to install.

Review Mode

After learning the phrases, you may press "Menu"->"Hide English"/"Hide French" to hide the English or French phrases so you can test if you remember its meaning in the other language. Tap the phrase to reveal the answer.

New Category(Full version only)

Press "Menu"->"New Category" to add new categories.

Edit/Delete Category

To edit/delete a category, long press the category and choose "Edit"/"Delete" from the popup menu.

New Phrase

Long press on a category, then choose "New Phrase" from the popup menu to add new phrase.

If you don't have a French keyboard, the app provides a small keyboard for entering special characters in French.

Edit/Delete Phrase

To edit/delete a phrase, long press the phrase and choose "Edit"/"Delete" from the popup menu.

Sort

You may sort the phrases alphabetically by press "Menu"-"More"->"Sort Alphabetically". You can also press the space right in front of each phrase, then drag/drop to re-order them.

Search

To find an item, click on "Menu"->"More"->"Search". A text box and "Find Next" button will show up at the bottom of the screen. Enter the word you search for and tap on "Find Next".

Backup and Restore Data

To backup your data, click on "Menu"->"Backup and Restore"->"Backup". Then click on "Backup" to use the default folder or "Select Folder" to choose different location.

To restore your data, click on "Menu"->"Backup and Restore"->"Restore". It will open default backup location. Choose the folder which contains backup files and click on "Restore". If you have chosen different backup location, then navigate to that location and click on "Restore".

You must use "Backup and Restore" feature to recover data if you need to un-install/re-install the app or upgrade from lite to full version.

Settings

User can choose not to display the pronunciation or change text size in "Settings". In paid version, user can also customize theme and colors.

Posted in: Travel Phrases | User Guide

Packing List User Guide(iPhone & iPad)

May 8, 2013 at 6:57 PMAdministrator

This application helps you to maintain packing lists and organize packing/unpacking process. It not only lets user to create a list from scratch, but also allows users to generate lists from an existing one. This application comes with a pre-loaded packing master list. When creating new list, you can specify departure/return date and destinations. Each packing item has note, quantity, location, luggage and weight fields. They are grouped by categories, but they can be viewed by locations or luggage. Mass change features allow you to edit lists more easily. You may also email and share your lists. Printing out a copy of the lists helps you in case of lost luggage.

Basic Features

Create New List

To create new blank list, click the "Menu"button at the top-left corner of the home screen and then select "New List".

To generate a list from an existing one, open an existing list and click "Menu"->"Mass Change/Generate List". Select items you want for the new list and click "Generate" button.

Delete List

In the "Packing Lists" home screen, tap and press the list until a floating menu pops up. Select "Delete".

Edit List

To edit list header info, long press the list name and click "Edit" from the popup menu. You can enter departure/return date, notes and destinations.

To edit list detail, tap on the list. The screen grouping items by their categories shows. You can then add/edit/delete packing items and categories.

Add New Category

Items in a packing list are organized by categories. In category view, click the "Menu" button at the top-right corner and then select "New Category" to add new category.

Edit/Delete Category

Tap and press the category until a floating menu pops up. Select "Edit" or "Delete".

Add New Item

  • Tap and press the category until a floating menu pops up. Select "new item".
  • Tap and press any item in the category until a floating menu pops up. Select "new item".

Edit/Delete Item

Tap and press the item until a floating menu pops up. Select "Edit" or "Delete".

Add Items From One List To Other Lists

From the "Packing Lists" home screen, open the original list. Click the "Menu" button at the top-right corner and then select "Mass Change/Generate List". In the "Mass Change" screen, select the packing items you want to include and click the "Add to" button at the bottom tool bar. A screen asking you to select target lists will pop up. 

Search Items

To find specific items, you can type in the name of the items in the search box. The list will filter items as you enter the search criteria.

Sort Categories/Items

In the screen grouping items by their categories, click the "Menu" button at the top-right corner and then select "Sort ...".

Advanced features(In-App purchase)
The optional paid "Packing List Advanced Feature" includes:
Group by Location/Luggage

To group items by location, open a list and click the "Menu"->"Group by ..."->"Group By Location".

To group items by luggage, open a list and click the "Menu"->"Group by ..."->"Group By Luggage". 

List Sharing

List Sharing allows you to share your list through email, text message and other social media. In the "Packing Lists" home scree, tap and press the list until a floating menu pops up. Select "Share".

Cloud Related Features(In-App purchase)
"Packing List Cloud Connector" is an optional paid feature. With the feature, you can edit lists using our free online editor from any devices such as desktops and laptops; upload, download, synchronize and operate on the same list from multiple devices; backup lists to our cloud server.
Upload, Download And Sync List With Cloud

In the "Packing Lists" home scree, click "Menu" button on the top left corner and select "Manage Cloud".

Or in the "Packing Lists" home scree, tap and press the list until a floating menu pops up. Select "Sync". On iPhone/iTouch, you need to click the right arrow in the floating menu to scroll to the "Sync" button."

Edit Lists Online

Open a browser and navigate to http://www.dotnetideas.com. Click the login button on the top right corner. After logging in, a web page will display your lists stored in our cloud server. Click the edit button to start editing.

Posted in: Packing List | User Guide

Chore Checklist User Guide(iPhone & iPad)

May 1, 2013 at 6:52 PMAdministrator

Chore Checklist helps you to manage multiple lists of chores at home or other places. It records chores' completion date and calculate next due date based on your preference. You can also set a reminder for each chore. It comes with a pre-loaded check list which has routines, such as "Daily Routine", "Weekly Routine", "Monthly Routine" and etc. You may edit them or add new routine/chores. Chore Checklist offers following two optional paid modules:

  • Chore Checklist cloud connector (US$4.99) To purchase the feature, click the menu button in the top navigation bar, select "cloud" and then select "Manage Cloud"
    1. Edit lists using web browsers on any devices such as desktops and latoptops. Notice, you can still create and edit multiple lists from within the free version of the application. However, the web interface provides more efficient editing experience.
    2. Sync and operate on the same list from multiple devices.
    3. Backup lists on our cloud server.
  • Chore Checklist advanced features.(US$1.99) To purchase the feature,click the menu button in the top navigation bar and then select "Due Date View" menu.
    1. Schedule chores based on day patterns. For example, you can schedule a chore to occur at every Monday and Friday.
    2. Aggregate chores from multiple lists in one screen and display them in the order of their due dates.
How to
  • Add/Rename/Delete a list

    In "Routine" view, click the menu button in the top navigation bar. Select "Manage Lists". You can rename or delete the current list or add a new list. Click "switch list" to select another list as the current list.

  • Add a Routine

    Click on "+ Routine" button on the right of the navigation bar. You can enter frequency which is how often you want to do the chores under this routine. For example, you can set the routine as every 2 days, every 2 weeks, every 3 months and etc.

  • Edit a Routine

    Click the edit image button at the very right of the routine's row.

  • Delete a Routine

    Press and hold on the routine's name then select "Delete" from pop-up menu.

  • Add a Chore

    Press and hold on the chore's name of a routine and then select "+ Chore" from pop-up menu.

  • Edit a Chore

    Click the chore's name or the "edit" image button of the chore. You can edit its name, notes, progress and etc.If you enter notes for the chore, the list view will display the notes in the chore's row.If its progress is set, the list view will display the percentage of the progress in the chore's row.

  • Delete a Chore

    Press and hold on the chore's name then select "Delete" from pop-up menu.

  • Complete/Skip a Chore

    When check off a daily chore, the completion date will be set to today. When check off non-daily chore, a date selection window will pop up for you to enter its completion date.If a chore has passed its due date, you can choose to skip the chore instead of completing it. Tap and hold on the chore's name and then select "Skip" from popup menu. It will re-calculate the next due date without changing the completion date.

  • Day Patterns for a Chore

    For chores under daily routine, you can set which days of week the chores need to be done. For example, you can choose only the weekdays or weekends, etc.The day pattern will be displayed on the list view when it is set.

  • Set Reminder for Chores

    For chores under daily routine, you can set the reminder to a specific time of a day. It will automatically repeat daily. For other routines, the reminder will be set relative to the due date or a specific time on the due date. It will not repeat until you complete/skip the chore. A clock icon will show in front of a chore's name when a chore has reminder set up.

  • Re-Order Chores/Routines of a list

    Press and hold on the list's name in the navigation bar and then select "Sort" from popup menu. To sort routines, click the "sort routines" button at the left of the navigation bar.

  • Automatic Reset

    Daily routine will be reset daily. That is if you checked some items today, they will be unchecked tomorrow automatically. Other routines' checkboxes will be unchecked at the half way towards the next due date.