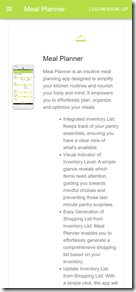
Meal Planner is an intuitive meal planning app designed to simplify your kitchen routines and nourish your body and mind. With its thoughtful features, Meal Planner integrates meal planning, inventory tracking, and shopping list generation. It empowers you to effortlessly plan, organize, and optimize your meals like never before.
Please note: this app is not a recipe app. You are responsible to enter your dishes to be used in the meal planning.
Key Features:
- Integrated Inventory List: Stay grounded with Meal Planner's integrated inventory list. It keeps track of your pantry essentials, ensuring you have a clear view of what's available, so you can make the most of your ingredients without any waste.
- Visual Indicator of Inventory Level: Meal Planner gracefully illuminates your inventory levels with visual indicators. A simple glance reveals which items need attention, guiding you towards mindful choices and preventing those last-minute pantry surprises.
- Easy Generation of Shopping List from Inventory List: Planning your grocery shopping has never been easier. Meal Planner enables you to effortlessly generate a comprehensive shopping list based on your inventory. By analyzing the recipes you intend to prepare and cross-referencing them with your current stock, the app identifies the exact ingredients you need to purchase, saving you time and effort.
- Update Inventory List from Shopping List: Meal Planner simplifies the process of updating your inventory list after a grocery run. With a simple click, the app will update your inventory, ensuring accuracy and minimizing duplication.
- Easy Meal Planning with Drag-and-Drop: Unlike other meal planning app, this app give you full control of how you want to plan your meals. It lets you enter dishes with key ingredients from your inventory. Then it provides a curated list of recommended dishes based on the inventory. By simply dragging and dropping these dishes onto your desired days, you can create a customized meal plan that perfectly suits your tastes and dietary preferences. Please note: this feature works best on a device with bigger screen, such as a tablet or PC.
Meal Planner invites you to embrace a mindful and nourishing approach to meal planning. Let it be your gentle guide, helping you reduce waste, maximize ingredients, and bring harmony to your kitchen. Download Meal Planner today and embark on a humble journey towards nourishment, one meal at a time.
Notes for the old Grocery Helper app users:
You will need to register a new account in Meal Planner. If you have the original "Grocery Helper - full" installed on your current device, the Ads in this app will be automatically removed after account registration. You can also migrate your lists from the old app to the new app. Please see “Backup and Restore” section below for more detail.
Login/Sign up
To login/Sign up, click “LOGIN/SIGN UP” button the top right of the home screen. You can sign in with Google/Apple or sign up using email/password.
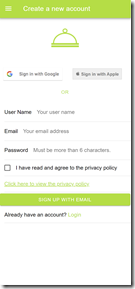
Once you signed up, the app will create some sample data for you.
The home screen has 3 tabs: Meal Planner, Inventory List and Shopping List. The default tab is “"Inventory List”. However, you can change it in “Account” view.
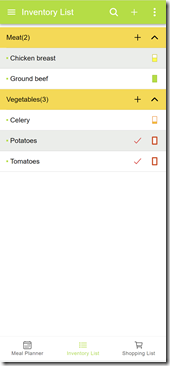
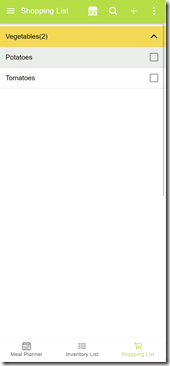
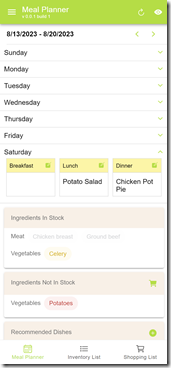
Inventory List
Add New Item
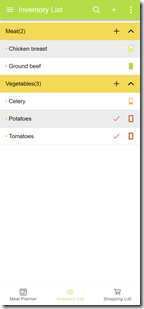
To add a new item to the inventory List, click on “+” icon on the top right. You can also click on the “+” on the right of the category name to add an item to that category.
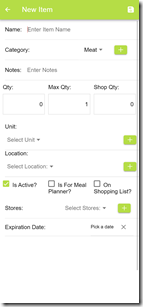
"Name" and "Category" are required fields. You can select a category from the drop down or add a new one by clicking on the “+” icon on the right.
Import Items
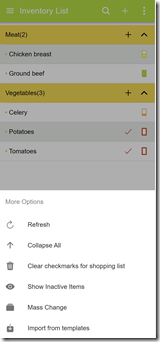
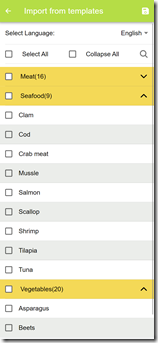
To import items from preloaded templates, click on the 3 dots icon on the top right. Then select "Import from templates" from the popup menu. It will open the import view. Select a language, pick the items you want and click on the save icon on the top right corner.
Edit Items
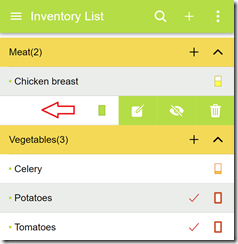
To edit an existing item, swipe the item name to the left. There are options to edit the item, make the item active/inactive, and delete the item.
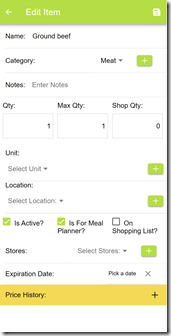
The item detail view allows to enter notes, edit quantities, units, location, stores, expiration date and price history.
Edit Inventory Level
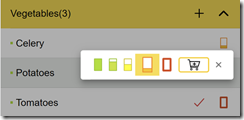
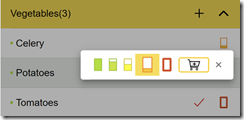
To edit the inventory level, click on the inventory level icon on the right of an item. You can then select the level by press one of the icon. From left to right, the icons represent full, near full, half full, near empty or empty. To select the icon for shopping list, press the shopping cart icon. To close the view, click anywhere outside the popup or click on the “X” icon on the right.
Mass Change
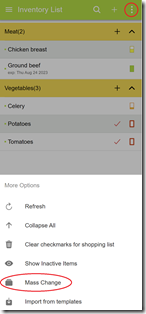
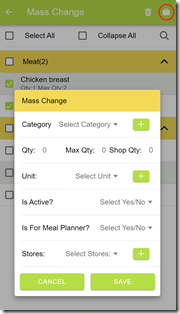
To make changes on multiple items, click on the 3 dots menu icon and then “Mass Change” from the popup menu. It will display items you are able to edit. You will select the items you want to change, then click on the  icon on the top right to enter the values. You can also delete multiple items here by clicking on the trash bin icon on the top right.
Shopping List
Add New Item
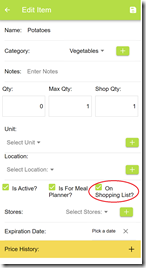
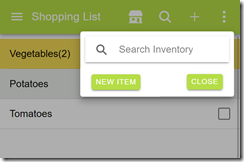
There are several ways to add an item to the shopping list. You can check the “On Shopping List” checkbox in the item detail view. You can also click on the shopping cart icon when edit the inventory level of an item. Or you can click on the “+” icon in the shopping list view. As you start typing in the “Search Inventory” box, matching items from the inventory list will show up. You can then add them to the shopping list. You can also add brand new item by click on “NEW ITEM” on the left.
Edit Items
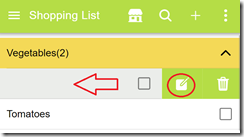
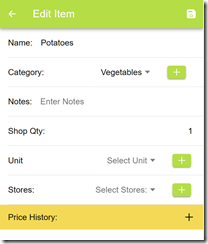
To edit an existing item, swipe the item name to the left. There are options to edit the item and delete the item.
Check Off Items
When check off an item in the shopping list view, you can choose to “Show Price Popup” or not. You can temporarily turn it on by click on the 3 dot menu on the top right and then click on “Show Price Popup” or go to Account view and change the switch there.
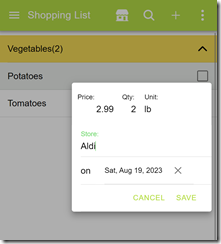
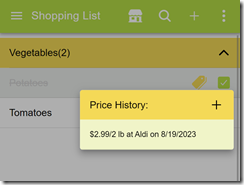
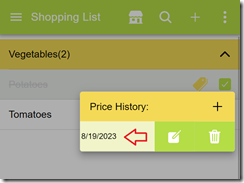
The price popup view will allow you to enter price for an item. The app will store latest 5 prices you entered. Once it is entered. a price tag icon will show up on the item. You can see the price history popup when you click on the price tag icon. To edit or delete a price, swipe the price to the left and click on the edit or delete icon.
Update Inventory List
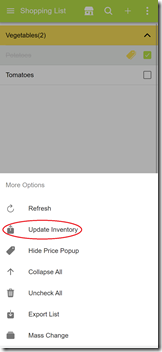
As you check off items in the shopping list, you can click on the 3 dot icon on the top right and click on “Update Inventory” from the popup menu. It will update the inventory level for that item in the inventory list and remove the item from the shopping list.
Export List
To email, text or share the shopping list with other people, click on the 3 dot icon on the top right and click on “Export List” from the popup menu. You can then select from the share-enabled apps(i.e. message or email) to share the shopping list.
Meal Planner
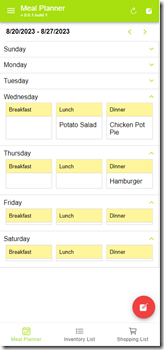
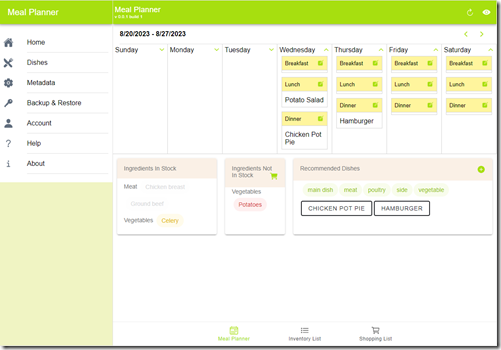
By default, the meal planner shows the read-only view. Click on the red floating edit icon at the bottom right of the screen to start planning the meals.
The edit view will display the current week, ingredients in stock and recommended dishes based on the ingredients in stock. You can drag-drop the recommended dishes to the planner. You can also move the dishes between meals and days. It is the best to use the edit view on a tablet or PC so you can easily drag/drop dishes.
Edit Dishes
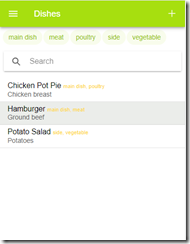
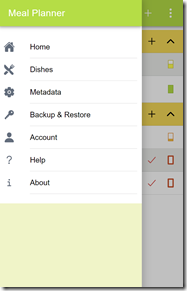
You will need to establish a dish list first in order to plan the meals. To edit dishes, click on the menu icon on the top left and choose “Dishes” from the menu.
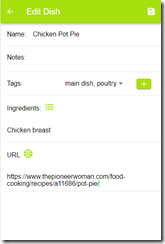
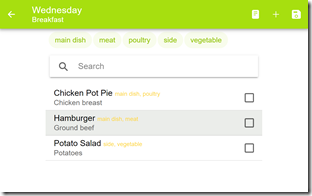
To add a new dish, click on the “+” icon on the top right of the dish list view. You can enter name and notes; add tags and ingredients; or add the URL of your favorite recipe.
To add/edit ingredients, click on the  icon. It will load all the inventory items with “Is For Meal Planner” checked. You can then select the ingredients for this dish. We recommend that you only select the main ingredients for the dishes because the selected ingredients will be used in the meal planning. When the ingredient is in stock, the dishes containing that ingredient will be displayed under the “Recommended Dishes”.
When click on the  icon, the app will open the recipe in the default web browser.
Plan Meals
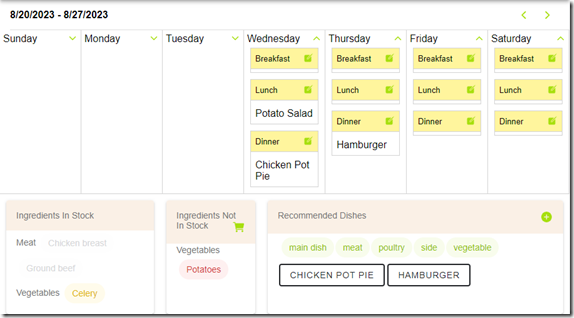
To plan the meal for current week, you click on the  icon on the right of each meal and then select the dishes from the meal detail view. You can also drag a dish from the recommended dishes panel and drop it on top of a meal. In the meal detail view, you may add new dishes or enter notes.
If a ingredient is not in stock, it will be showed in the “Ingredients Not In Stock” section. Click on  will add those items to the shopping list.
To switch current week you are editing, click the “<” and “>” icon on the top right of the view
Other Features
Edit Metadata
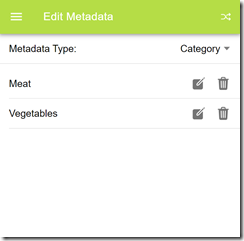
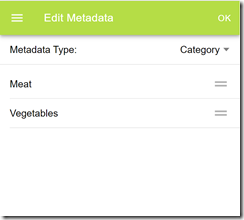
To edit metadata such as the categories, units, location and stores, click on the menu icon on the top left and then select “Metadata” from the menu. Then you can choose the metadata type from the drop down and start editing them. If you delete a metadata, the value will be cleared from all the items associated with that metadata. To change the order of categories, click on the  icon on the top right. It will enter reorder mode. You can then press the icon on the right and drag them around.
Share Lists Between Users
To share your list set with another user, click on the menu icon on the top left and click on “Account” to go to the account view. Then click on the “+” icon on the left of “Share List With”. Enter the email address you want to share the list with. An invitation will be sent to that user.
The user should see “Pending Invitations” in his/her account view. Once the user accepts the invitation, the list set name will show up under the “Default List Set” section. The user can then switch between the list sets.


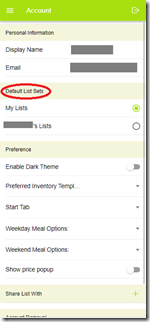
You can stop list sharing by delete the user from the “Share List With” section.
Backup and Restore(or Migration)
To backup and restore a list, click on the menu on the top left and then select “Backup & Restore” from the menu. It will save the lists to the local storage on your browser or device. On Android or iPhone, your data will be saved to the “Document” folder under “Internal storage”.
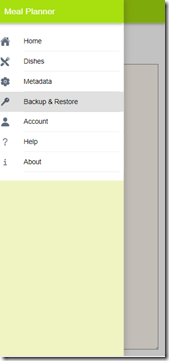
On an Android device, if you have the previous Grocery Helper app(lite or full) installed, the new app will display the button “Migrate From Grocery Helper” to allow you to migrate your lists from those apps.
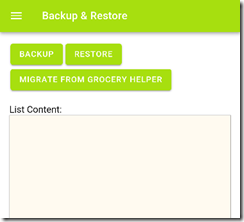
You will need to first use the “Backup and Restore” feature in the old Grocery Helper app to backup your lists to a folder which can be accessed by the new Meal Planner app. It is recommended to save your lists to the “Documents” or “Download” folder. When you click on the “Migrate From Grocery Helper” button, it will open the file picker which should look like the screenshot below. You can then navigate to the folder containing the backup and select the list file you want to migrate.
Please note: it will only migrate your inventory lists, not the shopping lists. You don’t need to migrate any system lists.
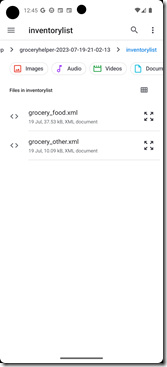
After selecting the file, you will be prompted to check the content and then click on the “Confirm” button to complete the migration.
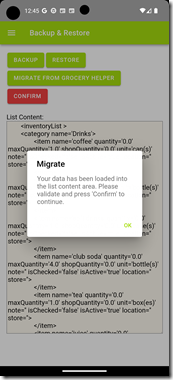
Sometimes if you don’t see your list after the migration, you might need to kill and restart the app.
Account View
To edit user preferences, sign out or delete the account, click on the menu on the top left and then select “Account” from the menu. In the preferences section, you can enable dark theme, select default tab, show price popup and etc..
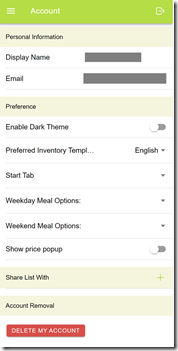
Please note, if you want to delete your account, you will be prompt to sign out and sign in again to refresh the credential.
Where To Find the Apps
Web Site:
https://mealplanner.dotnetideas.com
Google Play Store:
https://play.google.com/store/apps/details?id=com.dotnetideas.mealplanner
Apple App Store:
https://apps.apple.com/us/app/meal-planner/id6480026648
Contact Us
Please feel free to contact us at support@dotnetideas.com if you have any questions or feedback. Thank you!