Video Tutorial
Screenshots
User Guide
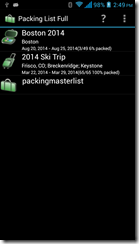
My Lists View
Since 3.1.0, new properties were added to lists. Now user can add destination, departure/return dates and notes to a list. Those information is displayed under list name in "My Lists" view.
Create New List
To create a new blank list, click on “Menu”->”New List” and enter the list name.
Since v3.2.0, "Generate List" has been moved under "Mass Change". To generate new list from existing one, open the existing list first. Click on "Menu"->"Generate List/Mass Change". Check the items you want to add to new list and click on "Generate List" button.
If you want to duplicate a list, first enter "Mass Change Mode" by clicking on "Menu"->"Generate List/Mass Change". Then click on "Menu"->"More"-"Check All" to select all the items. Click on "Generate List" and enter name for the new list.
Edit List Properties
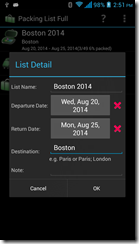
Tap and press a list, then click on "Edit" from popup menu. User can edit destination, departure/return dates and notes. Destination is semicolon-delimited field. For example, you may enter multiple destination as "Paris; London"(semicolon delimited);
Edit List Detail
Tap a list, it will open the list detail window. See detail below under "List Detail View".
Delete List
Tap and press a list, click on "Delete" from the popup menu to delete a list.
Rename List
Tap and press a list, click on "Rename" from popup menu and enter new name for the list
Backup and Restore List
To backup all lists, click on "Menu"->"Backup and Restore"->"Backup". Then click on "Backup" to use the default folder or "Select Folder" to choose different location.
To restore all lists, click on "Menu"->"Backup and Restore"->"Restore". It will open default backup location. Choose the folder which contains backup files and click on "Restore". If you have chosen different backup location, then navigate to that location and click on "Restore".
You must use "Backup and Restore" feature to recover data if you need to un-install/re-install the app or upgrade from lite to full version.
Email/Share List
To send a list to someone, click on "Menu"->"More"->"Send List". You can choose to send it by email, text message or other tools. The list will be sent in simple text format content as well XML format attachment. If the recipient has this application installed, he/she can use “Restore” feature to import the XML file into the app and start using it.
All the features above can be accessed from the list detail view as well. If you are in list detail view, click on "Menu"-"More"->"Manage List..." to access those menu items.
Check Weather(Full version only)
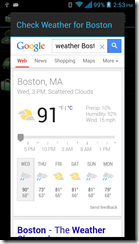
Tap and press a list, click on "Check Weather". If there are multiple destinations, a list of destination will show up to allow you to choose one.
All the features above can be accessed from the list detail view as well. If you are in list detail view, click on "Menu"-"More"->"Manage List..." to access those menu items.
Sync And Share Lists (Full version only with separate purchase of Cloud Connector)
To use this feature, you will need to purchase Packing List Cloud Connector and register on our web site www.dotnetideas.com first.
To login, click on "Menu"->"Sync List"->"Login". If you haven't register, you can click on "Register" from the login view. Then follow the instruction to register.
To enable auto-sync for lists. Click on "Menu"->"Sync List"->"Enable Auto-Sync For Lists" and choose the lists you want. The auto sync will happen when you start up the app and when you leave the app.
To download a list, click on "Menu"->Sync List"->"Download List". The app will retrieve all the available lists from server and allow you to choose which one you want to download. A shared list will have the owner's name next to the list name. Users can share and update the same list. Note: if you haven't upload your changes to the server, they will be lost if you download the same list again.
Settings
Go to "Menu"->"Settings..."->"Settings", you can choose the option to display/hide inactive items, location, quantity, weight and other settings.
In paid version, users can also customize the background and text colors of the lists.
Edit Location
The application provides a pre-loaded location list. To add/edit/delete locations, click on “Menu”->"Settings..."->”Edit Locations”. You can add new location, edit or delete them. There is one default location which you cannot delete it.
Edit Luggage
The application also provides a pre-loaded luggage list. To add/edit/delete luggage, click on “Menu”->"Settings..."->”Edit Luggage”. You can add new luggage, edit or delete them. There is one default luggage which you cannot delete it.
Recover Master List
The application comes with a pre-loaded packing master list. If you for any reason lost it, you may recover it by going to "Menu"->"More"-"Settings..."->"Recover System List"
List Detail View
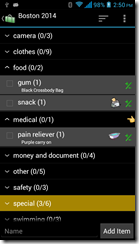
When click on a list from My Lists view, it will open up the list detail view.
Add Category
To add category, click on “Menu”->”New Category”. Or if you have the quick edit box showing at the bottom, collapse any category or collapse all, the button at the bottom will say “Add Category”. You can then enter a name and click on “Add Category” button to add a category.
Add Item
To add item under a category, press and hold the category and choose “New Item” from the popup menu. Or if the quick edit box is showing at the bottom, you may expand the category, the button at the bottom will change to “Add Item”. Enter the name of the item and click on “Add Item”.
Edit/Delete existing Category/Item
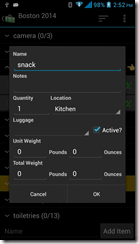
To edit/delete a category/item, press and hold the category/item until the menu popup. Choose corresponding menu items to complete the action. You may edit the name, quantity, location, luggage, active indicator, unit weight and total weight for each item. When you edit one of the weight field, the app will automatically calculate the other field if you have quantity set.
Quick Quantity Editing (Full version only)
In paid version, you can tap on the little +/- icon on the right of an item to quickly increase/decrease the quantity.
Move/Re-order Items
To move an item from one category to another, press and hold the item until the menu popup. Choose “Change Category” and select a new category for the item.
To add items from one list to another, select the items and click on “Menu”->”More”->"Mass Change..."->”Add Items to Existing List”. Then choose the other list from popup list.
You may also drag/drop item within category or across categories. Touch the empty space on the left of the check box, start dragging the item and drop it at desired place.
Re-order Categories
To re-order categories, touch the very left of a category and drag/drop it to desired place.
Group/Sort by
To re-group list by locations, click on “Menu”->”More”->"Group by..."->”Group by locations”.
To re-group list by luggage, click on “Menu”->”More”->"Group by..."->”Group by luggage”.
You can check off and edit items in both modes.
You can also sort alphabetically or by packed or not.
At end of packing, you may want to hide packed items to easily find unpacked ones. Click on "Menu"->"Hide Packed Item". A warning label at bottom of the screen will remind you this mode.
Search
To find an item, click on "Menu"->"More"->"Search". A text box and "Find Next" button will show up at the bottom of the screen. Enter the word you search for and tap on "Find Next".
Mass Change
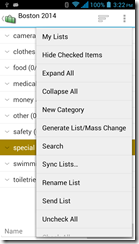
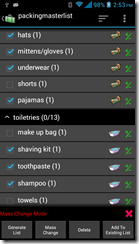
Click on "Menu"->"More"->"Generate List/Mass Change", the app will enter "Mass Change" mode. All the check boxes will be cleared. You check off the items you want to change and then click one of the three buttons at the bottom of the screen to edit their quantity/location/luggage, delete multiple items or copy them to existing lists. To exit "Mass Change" mode, click on "x" to close the "Mass Change" panel.
Since v3.2.0, "Generate List" has been moved under "Mass Change". To generate new list from existing one, open the existing list first. Click on "Menu"->"Generate List/Mass Change". Check the items you want to add to new list and click on "Generate List" button.
To set quantity, location and luggage, select items you want to change and click on “Mass Change” button and make changes in the popup window.
To move multiple items from one list to another, first check those items, then click on “Add Items to Existing List" and choose a list from popup window.
To delete multiple items, check those items first then click on “Delete" button.
Sync And Share Lists (Full version only with separate purchase of Cloud Connector)
To use this feature, you will need to purchase Packing List Cloud Connector and register on our web site first.
To login, click on "Menu"->"Sync List"->"Login".
To upload a new list or sync an existing list, open the list first in app view. Then click on "Menu"->"Sync List"->"Sync/Upload List". Your list will be uploaded to our server and your changes will be merged with other changes on the server since your last download/upload.
To download a list, click on "Menu"->Sync List"->"Download List". The app will retrieve all the available lists from server and allow you to choose which one you want to download. A shared list will have the owner's name next to the list name. Users can share and update the same list. Note: if you haven't upload your changes to the server, they will be lost if you download the same list again.
Edit List On Desktop
We provide free online list editor on our site at www.dotnetideas.com for users who purchased the full version and cloud connector. You will also find user guide and video tutorial there.