Video Tutorial
Screenshots
User Guide
Inventory List View
Create New List
This app comes with two pre-loaded grocery lists. One is for food related items and another for non food items. You may edit them to fit your needs or you can create a new one.
To create a new list, click on “Menu”->”More”->"Manage List"->”New List” and enter the list name.
Add Category
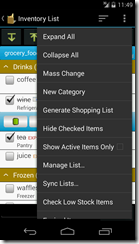
To add category, click on “Menu”->”New Category”. Or if you have the quick edit box showing at the bottom, collapse any category or collapse all, the button at the bottom will say “Add Category”. You can then enter a name and click on “Add Category” button to add a category.
Add Item
To add item under a category, press and hold the category and choose “New Item” from the popup menu. Or if the quick edit box is showing at the bottom, you may expand the category, the button at the bottom will change to “Add Item”. Enter the name of the item and click on “Add Item”.
Edit/Delete existing Category/Item
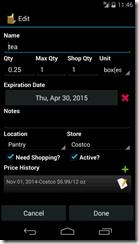
To edit/delete a category/item, press and hold the category/item until the menu popup. Choose corresponding menu items to complete the action. You may edit the name, quantity, location and luggage for each item.
Move/Re-order Items
To move an item from one category to another, press and hold the item until the menu popup. Choose “Change Category” and select a new category for the item.
You may also drag/drop item within category or across categories. Touch the empty space on the left of the check box, start to drag the item and drop it at desired place.
Re-order Categories
To re-order categories, touch the very left of a category and drag/drop it to desired place.
Mass Change (full version only)
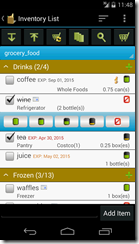
Mass Change helps to apply the same edit to multiple items. Click on "Menu"->"Mass Change..." to enter mass change mode.
Once you are in Mass Change mode, a little panel with three buttons will show up at the bottom of the screen.
To quickly set quantity, store, location and unit for multiple items, check the items then click on "Mass Change". Make changes to the fields you want to edit in the popup window. Make sure the checkbox in front that field is checked and click "OK"
To delete multiple items, click "Delete" button and confirm in the prompt.
To move multiple items from one list to another, first check those items, then click on "Add Items to Existing List" and choose a list from popup window
Manage Inventory
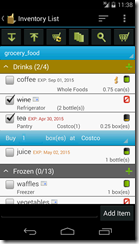
This app makes inventory management much easier. You just tap on the inventory level icon on the right of each item. A popup window will display a row of inventory level icon from empty to full. Tap one of the icon to adjust the level. You may enter quantity if you want more precise number.
Since version 1.3.0, this operation is changed to use expandable panel by default. Instead of displaying a popup window, the app will display a blue panel with 5 inventory level icons. You can change it back to popup window through "Menu"->"Settings..."->"Settings"->"Use popup dialog for prompt"
Select Low Stock Items
In Inventory List View, you can quickly select all items which stock level is under certain percentage (e.g. 25%, 50%) in order to generate Shopping List for them.
Check Expiration Date
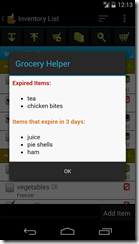
The first time you open Inventory List in a day, the app will check if there are items expired or about to expire and show them to you. You can review them by clicking on "Menu"->"Check Expiration Date" in Inventory List at any time.
Generate Shopping List
From the inventory list, you can check off items to generate the shopping list.
Check the items you want to add the shopping list. You will be prompt to enter the shop quantity and store. If you don't want to be prompt for every item, you can check "Do not ask again". This setting can be changed in "Settings".
Click on "Menu"->"Generate Shopping List". If a shopping list already exists, you will be prompt to either overwrite it or update it. Overwrite will clear the current shopping list and add the new items. Update will only add the new items and leave the existing items unchanged.
Shopping List View
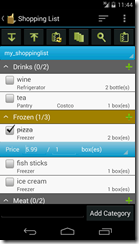
Shopping List View is similar to Inventory List View. You can add new list, delete/edit list the same way. You can also add/edit/delete/re-order categories and items.
Quick Add In Shopping List
To quickly add multiple items from existing inventory lists to current shopping list, click on "+" icon on the right side of a category. It will list all items under that category in Inventory List. Check the items you want to add to current shopping list and click on "OK".
Check Off Items In Shopping List
During your shopping trip, you can use the shopping list to reminder you the items you need to buy. When you check off an item, it will ask you to enter the store and price. They will be displayed in "Price history". If you don't want to be asked for each items, you can check "Do not ask again". You can always go to "Settings" to change it back.
Update Inventory From Shopping List
When you are done shopping, you may choose to update your inventory lists. Click on "Menu"->"Update Inventory List". It will update the quantity and price for each checked item in the shopping list. It will also ask you whether to delete checked items at the end.
Other Features Shared By Both Views
Group List By Location
To re-group list by locations, click on “Menu”->”More”->"Group by..."->”Group by locations”. You can check off items but you can not edit items in that mode.
Group List By Store
To re-group list by luggage, click on “Menu”->”More”->"Group by..."->”Group by Store”. You can check off items but you can not edit items in that mode.
Edit Location
To add/edit/delete locations, click on “Menu”->”More”->"Settings..."->”Edit Locations”. You can add new location, edit or delete them. There is one default location which you cannot delete it.
Edit Store
To add/edit/delete luggage, click on “Menu”->”More”->"Settings..."->”Edit Store”. You can add new store, edit or delete them. There is one default store which you cannot delete it.
Sync And Share List(Full version only)
To use this feature, you will need to purchase Grocery Helper Sync Provider and register on our web site www.dotnetideas.com first.
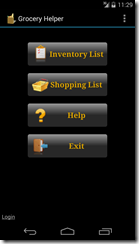
To login, tap the "Login" link on the main menu screen. After successful login, your user id/email will be displayed at the lower left corner of the main screen. To login using different account, tap the user id/email link.
To upload a list, open the list first. Then click on "Menu"->"More"->"Sync List"->"Upload List". Your changes will be merged with other changes on the server since your last download/upload.
To download a list, click on "Menu"->"More"->"Sync List"->"Download List". The app will retrieve all the available lists from server and allow you to choose which one you want to download. A shared list will have the owner's name next to the list name. Users can share and update the same list. Note: if you haven't upload your changes to the server, they will be lost if you download the same list again.
Email List
To send a list to someone, click on "Menu"->"More"->"Send List". You can choose to send it by email, text message or other tools. The list will be sent in simple text format content.
Settings
In "Menu"->"More"->"Settings..."->"Setting", you change and customize many options and colors.
Recover Master List
The application comes with two pre-loaded grocery lists. One for food related items and another one for non-food items. If you for any reason lost them, you may recover them by going to "Menu"->"More"-"Settings..."->"Recover Master List"
Edit List On Desktop
We provide free online list editor on our site at www.dotnetideas.com for users who purchased the full version and sync provider.